Welcome to my blog

If you enjoy finding a lot of different outlets for your creativity, then we may just be kindred spirits.
This blog is an outlet for my interest in miniatures, crochet, plastic canvas, and many other various arts and crafts.

I also love walking, taking digital photos, and most recently, have rediscovered an old love...bike riding! I purchased an amazing new bike, a comfy Townie by Electra this summer, and have been having a grand time exploring the area as though for the first time. It's like being a kid again!

If you enjoy any of these things too, pour a cup of coffee and tea, sit down, and join me.


Take care!
Kat
Showing posts with label home made. Show all posts

Friday, January 10, 2020

I Made Greek Yogurt for the First Time, in my Brand New Instant Pot

Greek Yogurt in the instant pot

First Time Ever Making Greek Yogurt

...in my brand new Instant Pot

My new Instant Pot Viva
My pretty red instant pot Viva is a 6 quart instant pot.  Quarts are a problem because I'm Canadian.  More about that later, lol.

I used THIS recipe. There are tons of recipes out there, but I liked this one because Kayti and Diane were the only bloggers who showed how to inexpensively drain the whey out of the yogurt...which I learned was the only difference between regular and Greek yogurt.  Greek yogurt is simply regular yogurt that has been strained to remove excess whey. Who knew, lol?  Not me, that's for sure.

Anyway, I didn't take photos of every step, and I had to adjust the recipe because I am Canadian and we don't have gallons.  Or quarts. We have litres.

So...our milk comes in bags.  I kid you not.  The outer bag holds three smaller bags, that come to a total of 4 litres of milk.  My math skills suck but my Dad assures me that means 1 inner bag has 1 and a third litres of milk. Trying to convert that to decimals and then to quarts was beyond me, lol.

So, I poured 2 out of the 3 inner bags of milk into the instant pot. According to Dad, that's 2 and 2/3rd litres of milk.  

THe recipe says to hit the yogurt button, then hit the adjust button, until boil shows up on the screen.  My pot does not have the adjust button so I had to reread (for the millionth time) the instructions.  Instead of hitting adjust, I just had to hit the "yogurt" button twice and the word "boil" showed up on the screen.

Then the pot did it's thing. I have no idea how long it took to come to a boil but when I went downstairs to check on it 40 minutes later, it had already done so.  I took the lid off and the milk had little bubbles on it.  I checked the temp with a food thermometer and it read 180 F (I'm used to celcius but the recipe called for 180 F so I was happy. Plus my thermometer showed both F and C, thankfully.

The next step was to take the inner pot out of the instant pot, and place it in a sink filled with cold tap water.  This step was supposed to take 10-15 minutes to cool the milk down to approx. 110.

I live in Northern Ontario, Canada.  It's winter here, and it was -20 C outside when I made the yogurt.  My tap water is basically ice water.  It took 5 minutes to cool the milk.  In fact, it cooled down to 100 C.  I was very worried and immediately pulled the inner pot out of the sink.  I placed it on a towel, dried it, and put it back in the instant pot.

The next step said to hit yogurt and adjust the time to however long you want...they suggested 8-10 hours.  I hit the yogurt button and it said "boil."  So I hit it again until it displayed yogurt.  Then I set the time for 12 hours because I didn't want to get up early or deal with the traffic in our family kitchen in the morning (it's crazy and everyone is mad before they have at least 2 cups of coffee, lol).  Best to avoid that.

So the instant pot did it's thing, and at 11:30 when I checked on it, it was done.

I lifted the lid and checked.  I had a full pot of yogurt. It looked good.  Really good.  

I would have been done right there and then except I wanted Greek yogurt, not normal yogurt.

So then I scrambled because I didn't have the right size strainer.  They were all too small or too big.

I had planned on using cheesecloth draped over a big pot like in the recipe, but my cheesecloth came in one very long, very thin strip!  Like a bandage!

So I improvised.  I grabbed a big pot that we usually use for large soups or for boiling pasta.  Then I put a ramekin in the bottom.  I put my instant pot steamer basket on top of the ramekin and rinsed the cheesecloth in hot water.  Then I draped it over the steamer basket so that it fit snugly. I used several layers so the entire basket was covered.  

Once it was covered, I poured the yogurt into the cheesecloth covered steamer basket.  There was so much yogurt it barely fit in the steamer basket.  It was right up a the top. 

It was suspended above the bottom of the big metal pot by the ramekin, and I hoped it was high enough up to keep the Greek yogurt out of the whey that would drip down into the bowl.  I pulled the ends of the cheesecloth up and over the yogurt and secured it with an elastic so that the entire thing was covered.

I didn't get photos because my family was gathered around giving helpful or not so helpful criticism.

I carried the jerry rigged strainer into the cold storage room, because the recipes suggested chilling the yogurt before draining  OR draining in the fridge.  I'm in Canada and our cold storage room is COLD.  Colder than a fridge, but not quite a freezer, lol. 

I left the yogurt to drain for 3 hours. Then I brought it back up to the kitchen, which thankfully was empty of feuding family members, so I was able to get some photos, lol.

The yogurt in the cheese cloth had shrunken down by quite a bit.  When I first wrapped it up, it was at the very top of the steamer basket and the elastic portion was standing straight up in the middle.
 The ramekin in the big bowl worked perfectly to keep the yogurt out of the whey, and I got a lot of whey.
Above, you can see yogurt had drained so much that not a drop is on the counter.  

 I ended up with more whey than I could keep. The container above holds 5.2 cups and was filled to the brim with whey. I kept it because there are a few recipes that call for it that I may try.
 When I unwrapped the cheese cloth, the yogurt was thick and dense.  Only a few bits stuck to the cheese cloth; for the most part, it rolled out of the cheese cloth into the bowl cleanly, leaving very little behind on the cheese cloth. I was really surprised.
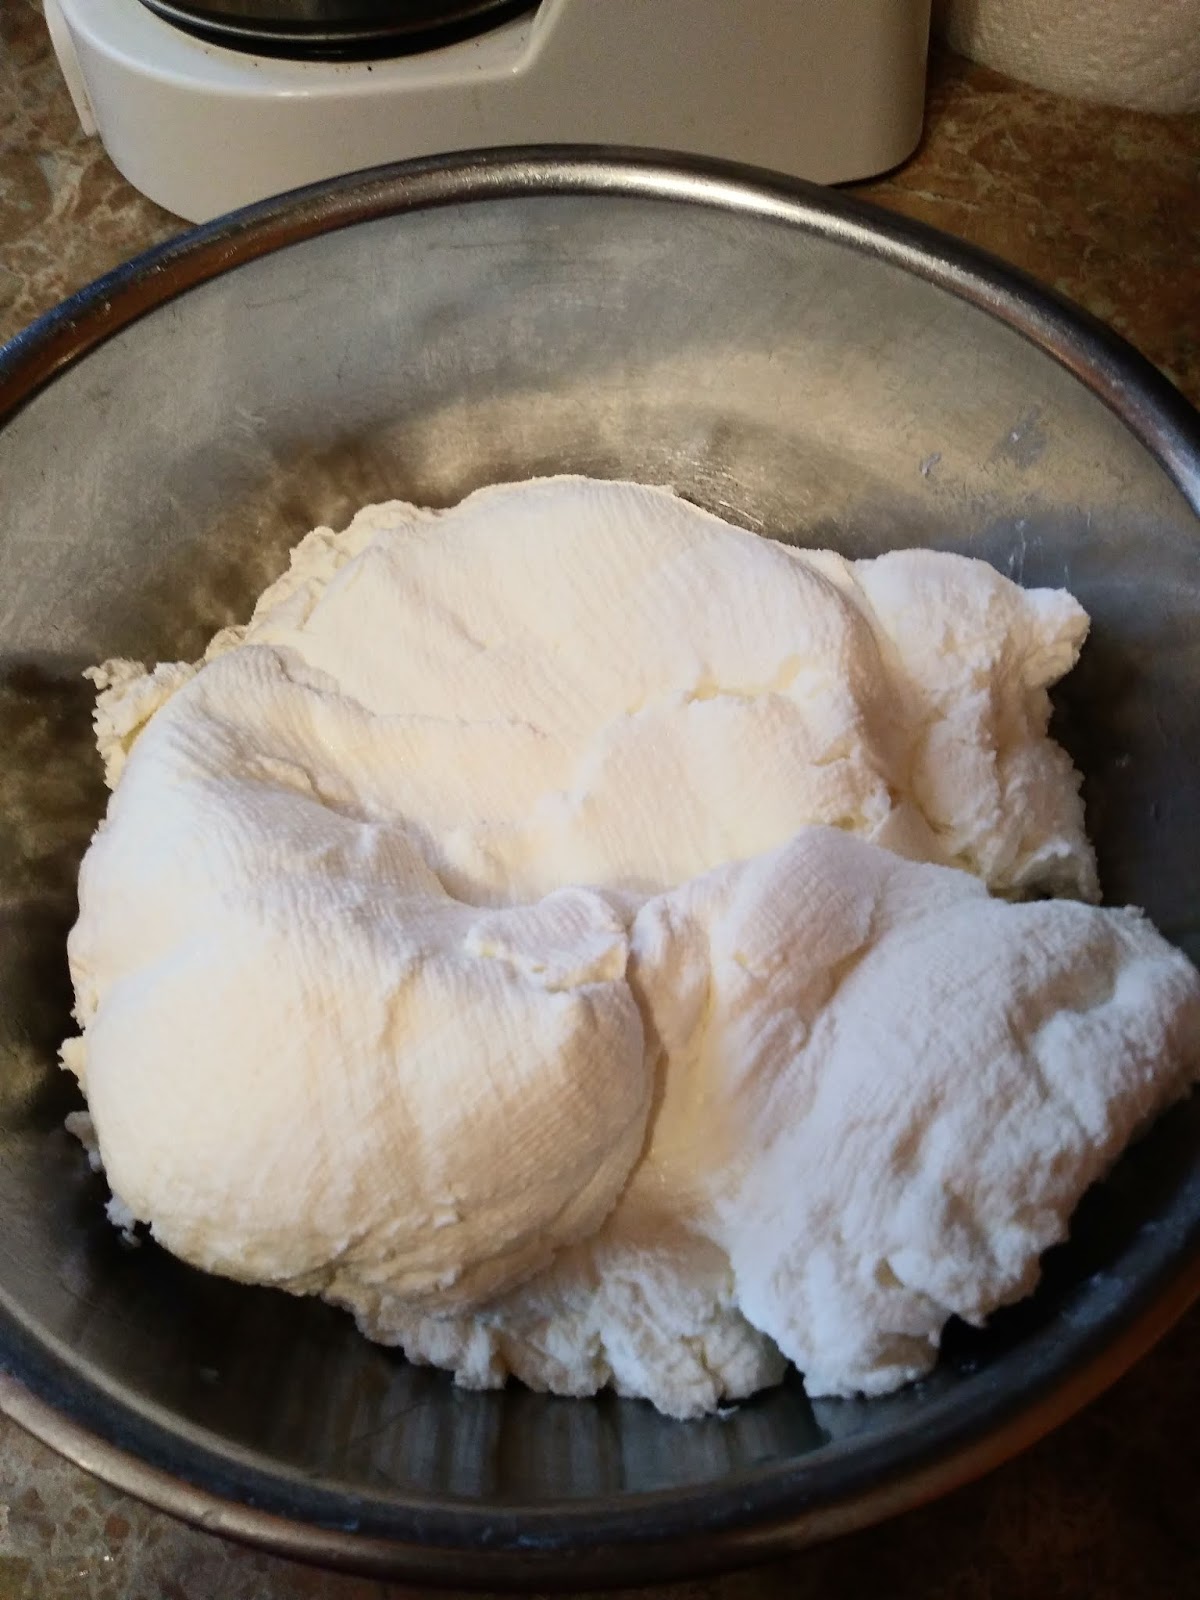
As you can see in the photo above, the Greek yogurt retained the pattern of the cheese cloth, lol.  It was thick...too thick.  I had to add back some whey to make it looser.  It had the consistency of cream cheese or butter before I added a few tablespoons of whey back.  It tasted divine, though. 
 After I added back a few tablespoons of whey, it was much creamier, but still super thick.  Two inner bags of milk made about 6 cups of Greek yogurt.  My container holds 5.2 cups, and I had too much yogurt to fit into the bowl...so I put the leftover in a serving bowl, to be eaten lol.


 As you can see, even after adding back whey, the Greek yogurt was thick enough to stand up a spoon in it.  I added blueberries and dived right in.
And OMG, it was the BEST Greek yogurt I have ever eaten.  

Before tasting it I didn't think I'd ever make this recipe again.  Now that I've tasted it, I can't imagine going back to store bought.

It is super creamy, and not at all tangy. I felt like I was eating blueberries and cream, not blueberries and yogurt.  

Normally I have to add a lot of sweetener to my plain Greek yogurt, but this didn't need any.  It was perfect with the fresh blueberries.  Very filling, too.

I will definitely make it again, but next time, I will only let it strain for 2 hours, not three.

Tuesday, January 7, 2020

Playing Santa for Shelter Cats

Crocheted Mice for Shelter Cats

Playing Santa for Homeless Cats

Ho Ho Ho!  I felt like Santa on Dec. 23rd as I gave out these crocheted mice toys for all of the shelter cats.

My hamster, checking out the crocheted mice
There are 18 crocheted mice in the photo above, and I made 2 more before I delivered them, and still didn't have enough.  The humane society only had 18 cats on their website, but they had 25 cats in the shelter because they hadn't updated their website.  Some of the cats already had toys, so we made sure that the cats who had no toys got the mice first.

I am deathly allergic to cats, and have severe asthma, so one of the volunteers at the shelter helped me give the mice out so I wouldn't get sick for Christmas.  Cats and smoke are my worst triggers, so I had to go fast but I did manage to get some (unfortunately not great) photos.
Pita and his crocheted mouse

Pita
Pita
Pita loved his mouse.  He is a beautiful orange cat with silky fur, and has been adopted!  Yay Pita!

Brucey

Brucey loved his toy, too.  He played with it right away.
Little Grey Kitens loved their crocheted mice


The little grey kittens were brother and sister.  They each got a crocheted mouse, but the little boy kitten wanted both of them, lol.
Chester
 Chester liked his mouse too, but I couldn't get a good photo of him playing with it because he moved so fast, lol. Chester was adopted; yay!
Vivian


Vivian, a gorgeous tuxedo cat, was also adopted.


I also brought in food treats for the cats, two huge packages.  The humane society was very happy, especially for the mice, and asked if I could make more because they get so many cats and kittens who come in with nothing.  I told them I'd be happy to, and asked how many they'd like, and they said, "As many as you care to make".  LOL.  So I'll be busy in the New Year, too.

I couldn't get more photos of the cats because my allergies and asthma were acting up and I didn't want to have to go to the hospital for a treatment, but all of the cats and kittens seemed very happy with their mice.  Unlike the dogs, they preferred the crocheted mice to the food treats. The dogs liked their toys but were more thrilled to get the edible treats, lol.

The guinea pigs liked their treats too.  Unfortunately, there were 25 rabbits in the shelter that I didn't know about because the humane society isn't great about updating their website (too busy taking care of all of the abandoned animals), or I would have bought more treats for small animals.

The mouse pattern can be found for free on Ravelry. It's called Jerry the Mouse.

Friday, November 24, 2017

Plastic Canvas Super Hero Coasters


Plastic canvas super hero coasters
 My friend Albert just bought his first home and he loves super heros, so I searched for super hero patterns and found these online, for free, courtesy of blogger, Kimberly Elliot:
super hero coaster patterns in plastic canvas

They're wonderful patterns, and will make a perfect house warming gift.  I found the cutest little windowed gift box at the dollar store to put them in, too!


I think my friend will like these.  I was so excited I couldn't wait to show him and shared a photo on his facebook page, lol.

Plastic Canvas Coffee Shop Bag Holder


I made this cute coffee shop bag holder to give to my Mom as one of her Christmas presents.
It's from the pattern book Village Bag Holders.

I've had this pattern book for YEARS and am so glad I finally tried it!  I absolutely love it, and might even make the bake shop and florist shop for my aunt and neighbor, if I have time. 

Here are a few more photos:


Sunday, December 4, 2016

Crocheting Fingerless Gloves as Christmas Gifts

So, after a long, long detour into bike riding, I'm back with a crochet post, finally.

Crocheted fingerless gloves
I found an amazing pattern on Ravelry
for these amazing Lacy Fingerless Gloves, and I immediately had to try them.

I made violet, purple, and blue ones first.
Variegated lacy finger-less gloves.

They're nice and warm and cozy, and can be worn as is, or over those little dollar store gloves. 
I liked the first pair so much I made more in cream, grey, and red.  Right now I'm working on a pair in variegated black, grey, and white yarn.  I plan on making 6 more pairs of these pretty lacy gloves, so I can give them out as Christmas gifts to my Mom, aunt Judy, cousin Linda, to Laurie and her girls, and to my nieces, Lexie and Claire.  I'm also going to make a pair of mittens for my nephew, Chris.

 It's a great pattern, completely free, and after the first pair I had the pattern memorized so I could crochet while watching Netflix.


I think they'll make lovely, unique gifts.  I'm going to make some hot chocolate and get to work.
Hope you all have a nice evening!

Thursday, December 17, 2015

Home made dog treats...for birds, tooo!


Baking peanut butter dog cookies

 My Mom has been baking Christmas cookies all week long, and my dogs have been pestering her every chance they get.  She gave them cookies, but we were concerned about the amount of fat and sugar the dogs were eating. 

I found a cool recipe on food.com, for peanut butter cookies for dogs . It's a simple recipe, with only 4 ingredients: peanut butter, flour, baking powder, and milk.  There is no sugar, but I did add 1 tbsp of honey.  The dogs patiently waited while the cookies baked. Even though the cookies smelled great in the oven, the dogs were patient.

Mac and Ben waiting for their cookies

Still waiting

Dog cookies cooling down
 Then they waited more while they cooled down. 

I used a fork to indent the cookies, like real peanut butter cookies, but the baking powder made them rise into little balls rather than the flat cookies I was going for.  The animals didn't seem to mind.
Smokey enjoying her peanut butter cookie
 Smokey, my African Grey, loved her cookie.  She loves peanuts so I thought she might enjoy a cookie.  She grabbed it out of my hand.  Next time I'll use a different recipe; one that calls for water instead of milk, so they'll be healthier for her. 

Mac
 Mac gulped down his cookies so fast I couldn't get a photo of him eating.  You can't really tell but he does  have one in his mouth in the photo above, lol.
Benji
 Benji loved them too, and I loved that they were soft enough for his little teeth to chew.  He's 15 years old, and chewing is hard for him.  He can't eat milkbone treats anymore.
Mac
Here's Mac looking depressed because I told him 3 cookies were enough.  I folded shortly after this photo and gave each dog one more cookie.

The recipe made 60 nice sized cookies.  They're healthy treats, filled with protein, and now the dogs can have their own Christmas cookies when we have ours.

Wednesday, January 30, 2013

A felted soapy mess

I don't know about you, but I get excited about new craft ideas.  Freaky excited, like a little kid at Christmas, lol.  It's like part of my brain lights up when I see a new craft I might like to try.

I love needle felting, plastic canvas, and crochet, as you might know. Today is my Mom's 69th birthday.  She isn't into needle felted animals, so that gift idea is out.  She has enough of my plastic canvas and crocheted items to start her own store, so that's out too.  She's forbidden me from buying her something, and  in the past 5 years has taken to recycling all of her old cards, so she doesn't even want a card (I buy one anyway).

So I was thrilled when I saw these cute felted soaps online at: http://greenscenesoapcompany.wordpress.com/2011/02/10/wet-dog-soap-or-a-quick-lesson-on-how-to-felt-soap/


The blogger over there at the green scene soap company called it wet dog soap.  The tutorial made it seem easy.  I decided to try it.

I used a bar of imported Greek Olive oil soap.  It was given to me as a gift years ago and i never used it because it was the 'good' soap, lol.  It foams up like crazy.  I'm talking bubble bath foam here.

I used some of my core wool, and some green for contrast.  I wanted to needle felt it first, but none of the tutorials I read suggested that.

All of the tutorials said it was easy to make felted soap.  Easy my butt.  First you have to wrap the soap in a felty blanket.  OK, so that part is easy.  Then you have to put it in a nylon, or sock if  you don't have a nylon (some of the tutorials said socks were OK).  Then you have to use hot water, as hot as you can stand, wet everything. and rub it on a bamboo placemat, bubble wrap, or anything that causes friction.  I'm thinking an old fashioned washboard like this would do the trick:


You know, your typical torture device from hell.

So, I rubbed and squished and squashed and my fingers went prune-y from the hot lather.  I was sweating.
My arms and shoulders were sore.  I figured, "it has to be done".  I opened the sock.  Nope.  It was a wet, soapy mess.

While it didn't smell like wet dog to me (I have two poodles, a standard and a toy, and I sewed them both raincoats in order to avoid that wet poodle smell), they sure do resemble matted dogs.  Wet, soapy dogs.  Wet soapy dogs who don't want to take a bath. The only difference is that wet soapy dogs do mat up easily.  This darn soap didn't.

So, I rubbed and squished and squashed some more, imagining I was Ma from Little House on the Prairie, that kind, gentle woman who always smiled as she did the work of 10 modern women without complaint.  The soap went flying, I swore, and realized I was nothing like Ma.  I looked in the handy mirror above the bathroom sink and saw myself frowning, rather like the  nasty Mrs. Olson.

I dropped the sock encased mess into the sink, rinsed my hands and arms, and poured a coffee.
I have a whole new respect for the people who do wet felting.  It is not fun.
I'll stick with dry felting, any day.
I wonder if my Mom would like a new crocheted scarf ;-).

The next day:

OK, I did manage to finish the felted soap.  It doesn't look great, but it does feel very nice.
felted soap
   
Needle felted dog, felted soap