
 |
| Greek Yogurt in the instant pot |
First Time Ever Making Greek Yogurt
...in my brand new Instant Pot
 |
| My new Instant Pot Viva |
My pretty red instant pot Viva is a 6 quart instant pot. Quarts are a problem because I'm Canadian. More about that later, lol.
I used THIS recipe. There are tons of recipes out there, but I liked this one because Kayti and Diane were the only bloggers who showed how to inexpensively drain the whey out of the yogurt...which I learned was the only difference between regular and Greek yogurt. Greek yogurt is simply regular yogurt that has been strained to remove excess whey. Who knew, lol? Not me, that's for sure.
Anyway, I didn't take photos of every step, and I had to adjust the recipe because I am Canadian and we don't have gallons. Or quarts. We have litres.
So...our milk comes in bags. I kid you not. The outer bag holds three smaller bags, that come to a total of 4 litres of milk. My math skills suck but my Dad assures me that means 1 inner bag has 1 and a third litres of milk. Trying to convert that to decimals and then to quarts was beyond me, lol.
So, I poured 2 out of the 3 inner bags of milk into the instant pot. According to Dad, that's 2 and 2/3rd litres of milk.
THe recipe says to hit the yogurt button, then hit the adjust button, until boil shows up on the screen. My pot does not have the adjust button so I had to reread (for the millionth time) the instructions. Instead of hitting adjust, I just had to hit the "yogurt" button twice and the word "boil" showed up on the screen.
Then the pot did it's thing. I have no idea how long it took to come to a boil but when I went downstairs to check on it 40 minutes later, it had already done so. I took the lid off and the milk had little bubbles on it. I checked the temp with a food thermometer and it read 180 F (I'm used to celcius but the recipe called for 180 F so I was happy. Plus my thermometer showed both F and C, thankfully.
The next step was to take the inner pot out of the instant pot, and place it in a sink filled with cold tap water. This step was supposed to take 10-15 minutes to cool the milk down to approx. 110.
I live in Northern Ontario, Canada. It's winter here, and it was -20 C outside when I made the yogurt. My tap water is basically ice water. It took 5 minutes to cool the milk. In fact, it cooled down to 100 C. I was very worried and immediately pulled the inner pot out of the sink. I placed it on a towel, dried it, and put it back in the instant pot.
The next step said to hit yogurt and adjust the time to however long you want...they suggested 8-10 hours. I hit the yogurt button and it said "boil." So I hit it again until it displayed yogurt. Then I set the time for 12 hours because I didn't want to get up early or deal with the traffic in our family kitchen in the morning (it's crazy and everyone is mad before they have at least 2 cups of coffee, lol). Best to avoid that.
So the instant pot did it's thing, and at 11:30 when I checked on it, it was done.
I lifted the lid and checked. I had a full pot of yogurt. It looked good. Really good.
I would have been done right there and then except I wanted Greek yogurt, not normal yogurt.
So then I scrambled because I didn't have the right size strainer. They were all too small or too big.
I had planned on using cheesecloth draped over a big pot like in the recipe, but my cheesecloth came in one very long, very thin strip! Like a bandage!
So I improvised. I grabbed a big pot that we usually use for large soups or for boiling pasta. Then I put a ramekin in the bottom. I put my instant pot steamer basket on top of the ramekin and rinsed the cheesecloth in hot water. Then I draped it over the steamer basket so that it fit snugly. I used several layers so the entire basket was covered.
Once it was covered, I poured the yogurt into the cheesecloth covered steamer basket. There was so much yogurt it barely fit in the steamer basket. It was right up a the top.
It was suspended above the bottom of the big metal pot by the ramekin, and I hoped it was high enough up to keep the Greek yogurt out of the whey that would drip down into the bowl. I pulled the ends of the cheesecloth up and over the yogurt and secured it with an elastic so that the entire thing was covered.
I didn't get photos because my family was gathered around giving helpful or not so helpful criticism.
I carried the jerry rigged strainer into the cold storage room, because the recipes suggested chilling the yogurt before draining OR draining in the fridge. I'm in Canada and our cold storage room is COLD. Colder than a fridge, but not quite a freezer, lol.
I left the yogurt to drain for 3 hours. Then I brought it back up to the kitchen, which thankfully was empty of feuding family members, so I was able to get some photos, lol.


Above, you can see yogurt had drained so much that not a drop is on the counter.


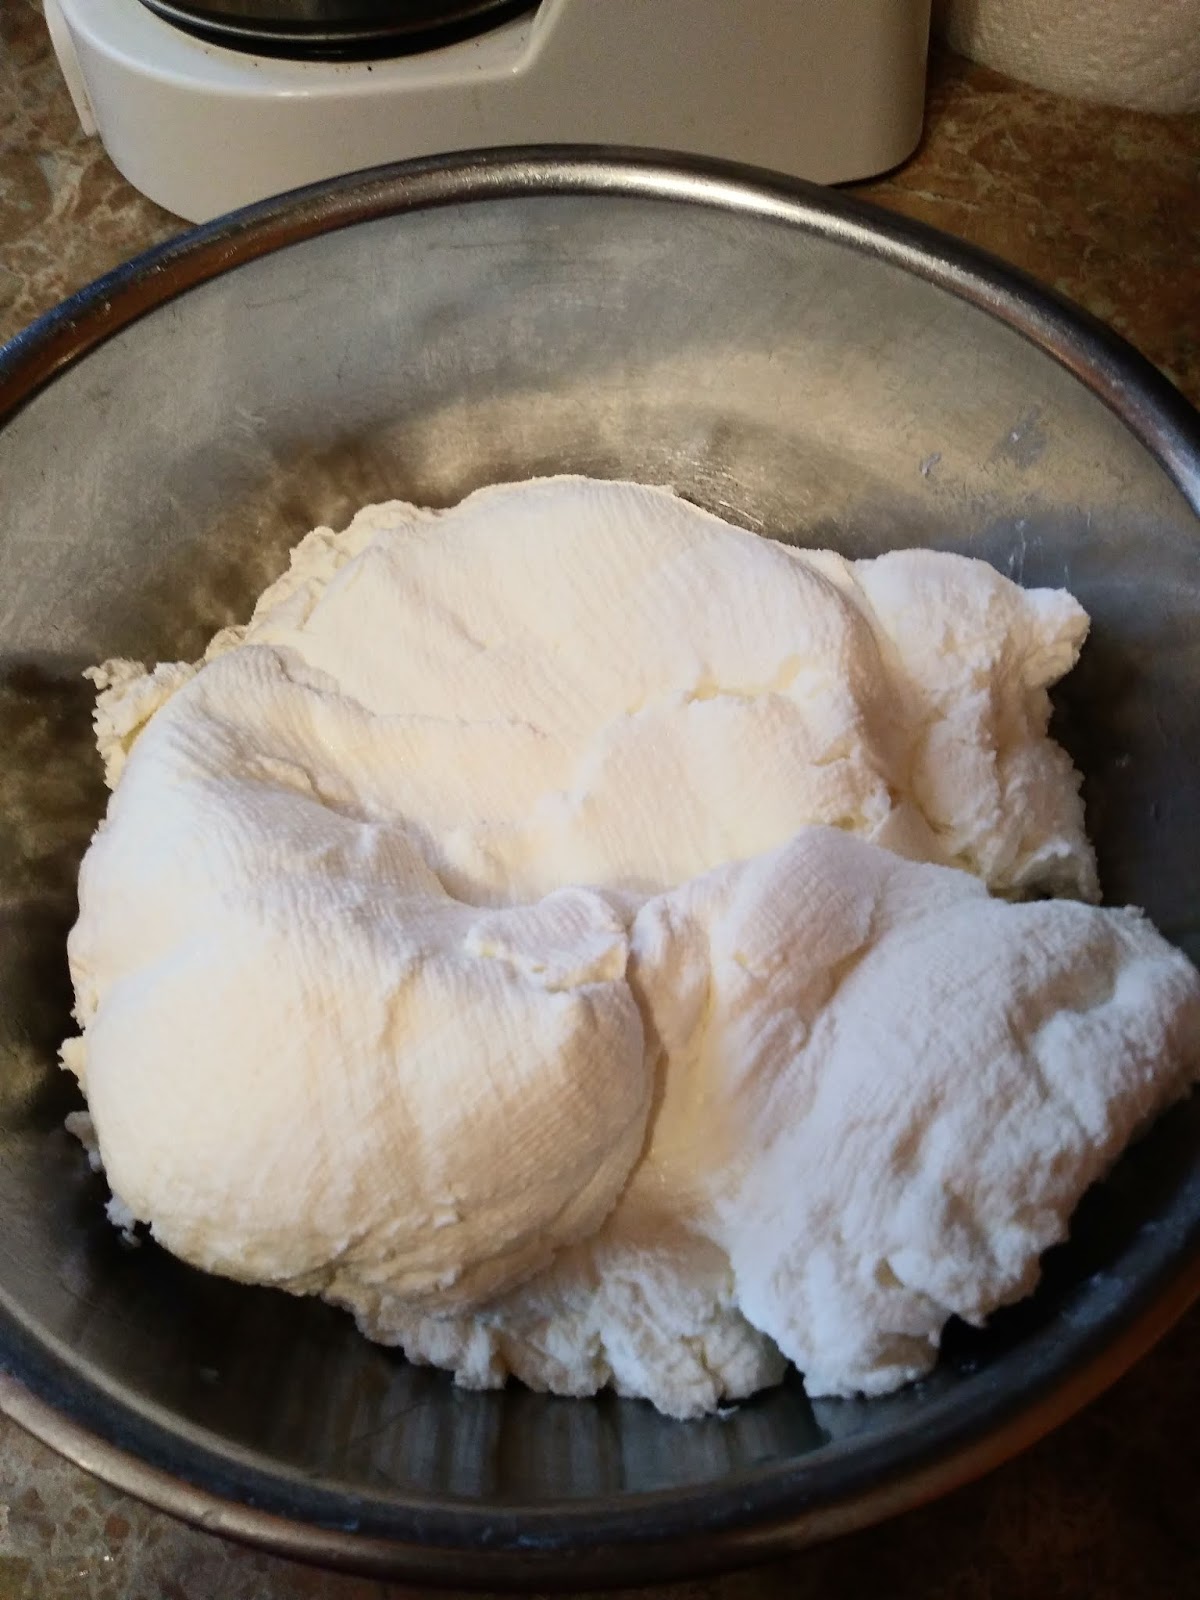
As you can see in the photo above, the Greek yogurt retained the pattern of the cheese cloth, lol. It was thick...too thick. I had to add back some whey to make it looser. It had the consistency of cream cheese or butter before I added a few tablespoons of whey back. It tasted divine, though.


And OMG, it was the BEST Greek yogurt I have ever eaten.
Before tasting it I didn't think I'd ever make this recipe again. Now that I've tasted it, I can't imagine going back to store bought.
It is super creamy, and not at all tangy. I felt like I was eating blueberries and cream, not blueberries and yogurt.
Normally I have to add a lot of sweetener to my plain Greek yogurt, but this didn't need any. It was perfect with the fresh blueberries. Very filling, too.
I will definitely make it again, but next time, I will only let it strain for 2 hours, not three.
No comments:
Post a Comment