
Welcome to my blog! If you enjoy arts and crafts, dolls, needle work...relax and stay awhile!
Showing posts with label dollhouse. Show all posts
Showing posts with label dollhouse. Show all posts
Friday, April 26, 2024


Monday, April 18, 2016
Easiest Mini Hedges Ever
 |
| Simple mini hedge |
I made something on my own with no tutorials, lol. Yay!
I have always loved our privacy hedges. They surround our family home on three sides, and I have fond memories of searching for lady bugs in the hedges for hours on end with my best friends, Laurie and Maria, when I was a little girl.
I wondered if a hedge would look nice on my patio, to help anchor the topiary trees, so I made a very simple one. I used left over foam core from my bake shop, cut it so it would be 4 inches tall (4 feet tall in miniville, lol), and as long as I needed it to fit on the patio. I cut two pieces in the size that I needed, glued them together with tacky glue, and painted them green and brown so the white wouldn't show through.
When that was dry, I chopped up some dollar store reindeer and regular moss so it was smaller, coated the foam with tacky glue, and dipped it in the chopped moss.
After it dried (it took all day), I cut a thick craft stick to fit along the bottom of the hedge, painted it dark brown, let it dry, and glued it to the mossy foam using a glue gun. Then I ran a bead of glue gun glue along the edges of the craft stick and added dried coffee grains to simulate dirt. I gently pushed the grounds down so they were completely embedded in the glue. I used the glue gun to stick the hedge with dirt bottom onto my patio and was done. Sorry I didn't photos of steps along the way, but I was experimenting and wasn't sure how it would turn out.
 |
| Rear view of mini hedge |
 |
| Dolls enjoying outdoor patio and hedge |
 |
| Mini patio |
 |
| Mini patio with hedge and topiary trees |
I am loving this, can you tell? Hope you're enjoying the journey with me.
Thursday, April 14, 2016
Mini Bake Shop Interior is Complete
I stayed up late and finished the interior of my little mini bake shop! I glued all of the individual pieces to the furniture and glued the furniture to the floor so there won't be earthquakes every time I move the thing, lol.
I made just about everything in the shop, including the shop. The only things I bought were the mini cola bottles, the little table at the back, and the shop counter which was a dollar store dresser turned upside down and backward and modpodged. I had the table, which I found at a dollar store several years ago. I made everything else. I did buy some little kitchen utensils (forks, knives, spoons) but they're not in the scene because I can't find them. I remember putting them away but have no idea where. They should be in my little mini container but they're not there.
 I'm pretty happy with the way everything turned out. It's not perfect and I made lots of mistakes but I had fun and I learned what to do (and not to do, lol) next time.
 Sadie and Michelle are happy. Poor Rufus is still waiting for his dog bowl. I'll do that soon.
 Now that the interior is done I can work on the patio. I want more (and larger) plants, a bench, and who knows what else, lol. Maybe a bird feeder and a little bird.
Here are a few more pics, sans the dolls.


 Well, it's after midnight again, and time for me to wind down.
 |
| Miniature bake shop interior is done! |


Here are a few more pics, sans the dolls.


Miniature Curtains, Cash Register Stand, and Furniture Placement
My little foamcore doll shop is coming along! Last night I glued in the shelf unit and the little table, and added curtains. I put little foam corner decorations on the top of the shelf unit and they were perfectly even when I glued them on but I noticed they've shifted a bit. I guess I squished them when I put them on and they became unsquished, lol. Next time I'll use card stock. Live and learn :-).


 |
| Dollar tree miniature dresser turned upside down and backward and mod podged into a counter, lol. |
 |
| Foam core mini bake shop in progress. |
 | |||
| Foam core mini dollhouse cake shop in progress |
I'm loving this little shop, and my favorite part is learning how to take every day or found or dollar store items and turning them into minis.
So far I've learned that dollar store foam core sheets make great structures. Scrap book paper makes great wallpaper. Buttons make great clocks and cake trays. Mod podge is wonderful. Cutting and folding printables is frustrating. Ribbon, dowel, and lace make cute curtains. Popsicle sticks make great shelf units. Buttons make good doorknobs. Beads make great computer monitor stands. My printer eats ink like it's starving. Cereal boxes can be cut and glued into layers to simulate thin wood. Scissors get dull too quickly. I have more glues than I ever thought I would. There is no such thing as a cheap dollhouse. And last but not least; I still like playing with dolls, lol.
Monday, April 11, 2016
Mini Napoleon Pastries and Mini Books
Napoleons! I love them, and when I saw this tutorial on Youtube, I had to try it!
These look so simple to make but were actually very fiddly. It would be easier if I had one of those long straight cutters that look like metal rulers that everyone has, that or a little rectangular cut out. I had to cut my rectangles myself and it is not easy to get them to match, even when I stacked them. I think next time I try them I'll do it differently and do a big sheet of dough color, followed by the filling, dough, filling, dough, and then cut them after they're stacked. I guess I should have said I'll layer them before cutting them, lol. That sounds better.
I made the books the other day, and they look so sweet in this scene.
 My white icing isn't white enough; I'd like it whiter so I guess I should have added more white chalk pastel to the Liquid Sculpey. I used a toothpick to spread the white "icing", and a sewing pin to do the chocolate lines. One of my chocolate lines seems to have spread while baking, or maybe I smudged it when I put it in the oven? I'm not sure.
 Here's a photo to show the size of the treats.
 The look nice on my button cake stand, lol I used the sewing pin to give texture to the pastry layer, and a dotting tool to do the custard layer. I need more practice with the dotting tool.
 Sadie is happy with her new cookbooks, and she says the Napoleons are delicious.
 I also made these two handles for my sewing needle and my sewing pin, so they'll be easier to hold. I used scrap clay that I cut from the sides of the Napoleons and just held them so they were comfy so they're not pretty, but they're made exactly for my grip, lol. I put a bit of liquid sculpey at the base to help hold them in place after they're baked, and it pooled at the bottom while it baked, but that's OK.
That's it for today. My little dog Benji is whining for his 8 PM treat (he does this every night at 8 on the dot, lol.
Take care.
 |
| Miniature Napoleons and books |
I made the books the other day, and they look so sweet in this scene.


That's it for today. My little dog Benji is whining for his 8 PM treat (he does this every night at 8 on the dot, lol.
Take care.
Wednesday, April 6, 2016
Miniature Pies
More pies, lol. I get hungry making these polymer clay desserts for some reason. I made the apple and lemon pies today, and the blueberry and pie crusts yesterday.
The Apple pie is my favorite; I used new techniques that I learned from watching SugarCharmShop's tutorial
The lemon came out OK but my yellow is too yellow-y. I tried making it lighter by mixing it with white polymer clay but it gave it a green tinge so I used it as is. The meringue is white polymer clay mixed with liquid sculpey. I mixed a bit of yellow polymer clay with liquid sculpey to get the goopy lemon look on the bottom of the pan. I have to tint the edges of the meringue golden brown later; not sure what paint I should use on baked clay.

 Sadie is very happy with her pies, but she's rather a messy eater. She spilled pie filling on the table ;-).
 |
| Mini pies for the dollhouse bake shop |
 |
| Polymer clay miniature apple pie |
 |
| Polymer clay mini lemon meringue pie |


Saturday, April 2, 2016
Miniature Donuts
Donuts! I love donuts so of course I had to try making mini ones. I think these are my favorite minis of all, lol.

They were so tiny I had to use a magnifying glass and reading glasses to make them. I rolled a snake of polymer clay; cut it into tiny bits, rolled the bits into balls, squashed them a bit with my finger, and poked a hole in the center with a toothpick.
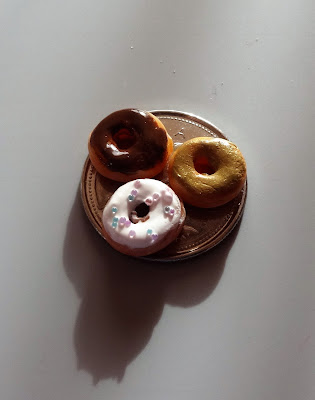 I used chalk pastel to color them, and I indented them in the center a bit with an exacto knife. I followed this Youtube tutorial from SugarCharmShop
to make the donuts. I LOVE her tutorials; she does amazing work.
 I pulled out this quarter to show scale and discovered quarters make great cake plates, lol.
 I wish I knew where this little tray came from. I know it's from packaging that I kept to use but I can't remember which packaging, or else I'd go buy more as it makes a perfect donut tray.

Sadie is taking time to relax from baking by testing out the new chairs. She thinks they're uncomfortable because she can't fully bend her legs when she sits in them; the seat is too low. (I found the chairs at a dollar store in Guelph 4 years ago. I wish our dollar store carried minis.)
Rufus is very happy with his dog treat! He can't wait to eat it.
Sadie can't decide if she likes the white rainbow cake or the chocolate rainbow cake better.
On a side note, yesterday was April Fool's day and my 84 year old Uncle Buck always plays April Fools jokes on me. Yesterday I decided to trick him for once. He loves sweets, but is diabetic so he's not supposed to have them often. Yesterday I told him I was sending over a special cake that had no fat and no sugar. I gave my Dad one of my tiny mini chocolate cakes to give to my uncle, and my Dad carefully wrapped it in a tissue and put it in his pocket. I wish I could have been there to see my uncle's face when he got his cake, lol. My Dad said he cracked up laughing. Later, when I talked to him on the phone, he said he laughed, but he loves the little cake and is going to make a pedestal for it so he can display it.
 |
| Miniature baked goods |

They were so tiny I had to use a magnifying glass and reading glasses to make them. I rolled a snake of polymer clay; cut it into tiny bits, rolled the bits into balls, squashed them a bit with my finger, and poked a hole in the center with a toothpick.

to make the donuts. I LOVE her tutorials; she does amazing work.


 |
| Mini dog biscuits |
My mini dog treats need work, lol.
 |
| Mini bake shop in progress |
I love the way the potted plant shows through the window in this picture; looks like a tree outside, lol. I really need to make some curtains, shelves, chairs, posters, cash register, and figure out where to put the display case. I like it angled like this for photos but don't think I want it there permanently. I should have drawn a photo of my ideas for the place before beginning rather than just make things and try to figure out where to put them later, lol. Live and learn :-).

Sadie is taking time to relax from baking by testing out the new chairs. She thinks they're uncomfortable because she can't fully bend her legs when she sits in them; the seat is too low. (I found the chairs at a dollar store in Guelph 4 years ago. I wish our dollar store carried minis.)
Rufus is very happy with his dog treat! He can't wait to eat it.
Sadie can't decide if she likes the white rainbow cake or the chocolate rainbow cake better.
On a side note, yesterday was April Fool's day and my 84 year old Uncle Buck always plays April Fools jokes on me. Yesterday I decided to trick him for once. He loves sweets, but is diabetic so he's not supposed to have them often. Yesterday I told him I was sending over a special cake that had no fat and no sugar. I gave my Dad one of my tiny mini chocolate cakes to give to my uncle, and my Dad carefully wrapped it in a tissue and put it in his pocket. I wish I could have been there to see my uncle's face when he got his cake, lol. My Dad said he cracked up laughing. Later, when I talked to him on the phone, he said he laughed, but he loves the little cake and is going to make a pedestal for it so he can display it.
Friday, April 1, 2016
Dollhouse Mini Cakes
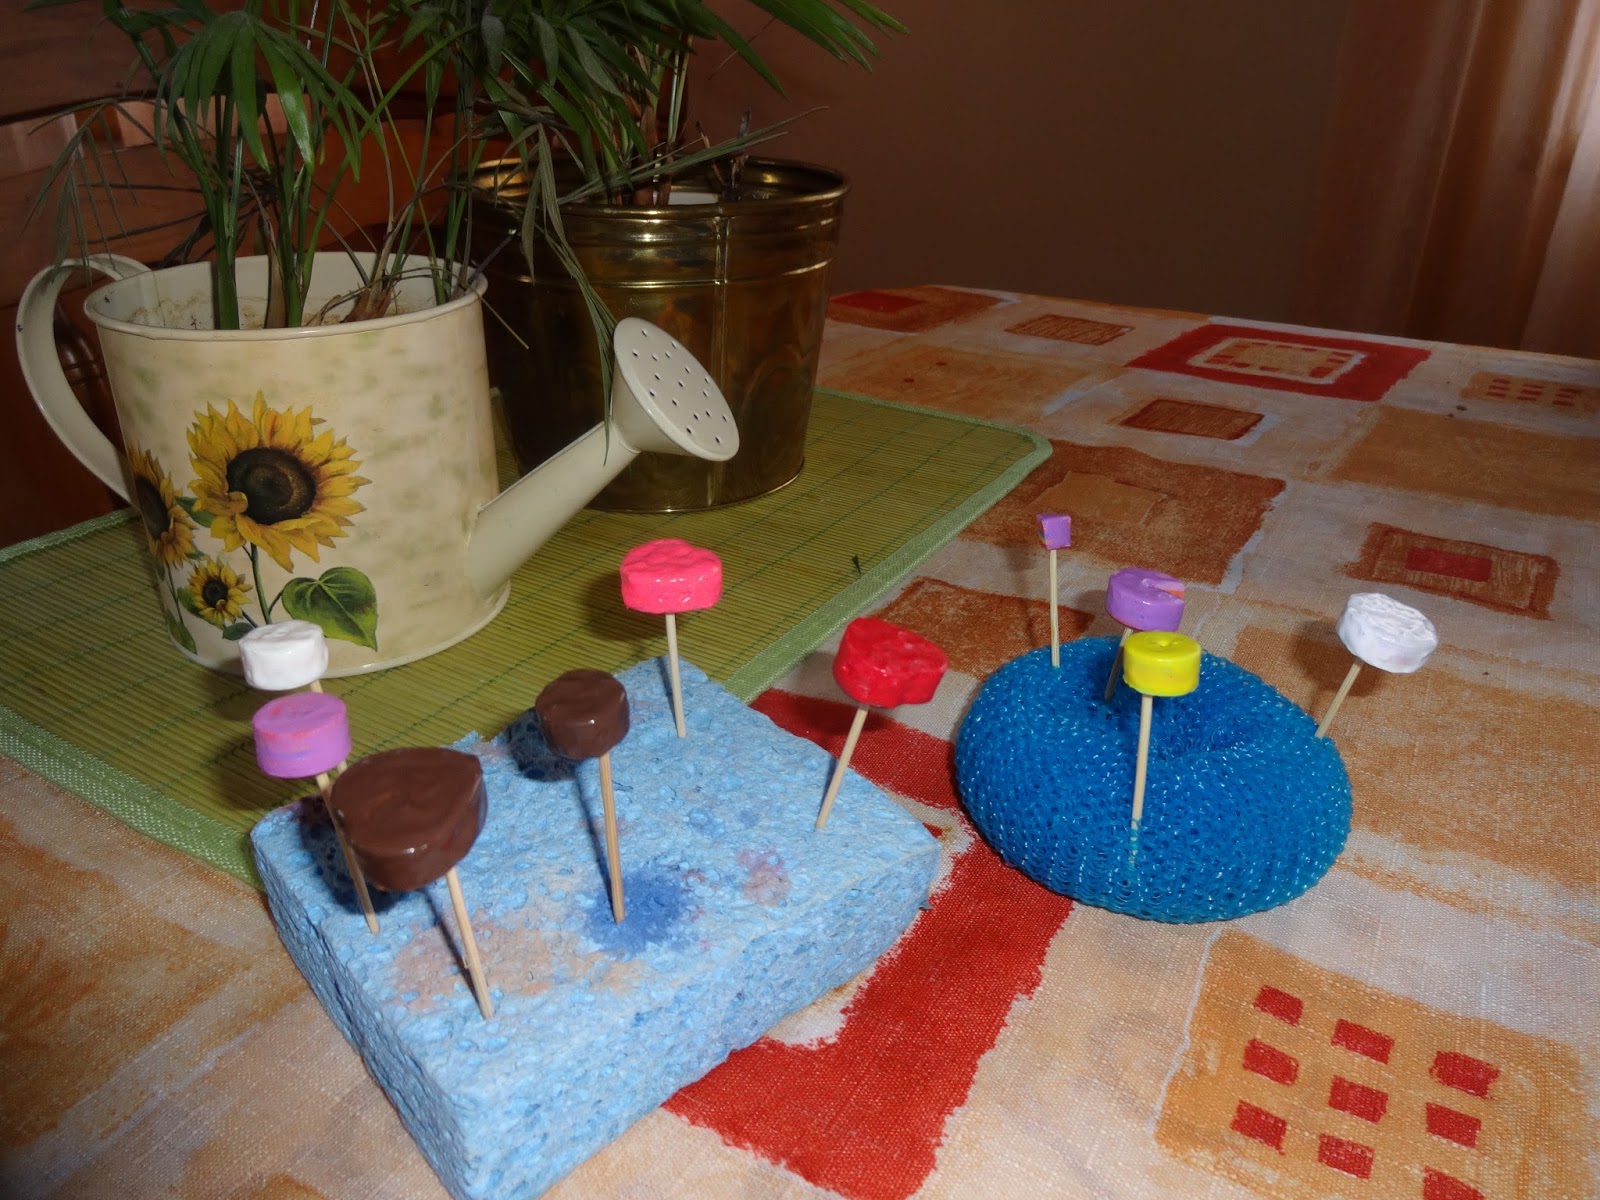
These miniature cakes were simple but time consuming to make. I used little foam shapes that I found at the dollar store, covered with 3 dimensional fabric paint for frosting. I cut wedges out of some of the cakes and poked the foam to make it look textured, and others I left whole.
I made lots of them, and used two different types of fabric paint; some from Michael's and some from the dollar store. The Michael's paints are way better and dried overnight, but the dollar store paints are still tacky and thinned out alot and will need another coat. The better paints are the brown, white. and pink ones. The yellow, red, and lilac were from the dollar store.

Sadie was happy to see the cakes but put in a request for some donuts. Rufus begged so much that Sadie promised to make him some dog treats, too.
 |
| Miniature cakes |
 |
| Mini cakes drying |

Sadie was happy to see the cakes but put in a request for some donuts. Rufus begged so much that Sadie promised to make him some dog treats, too.
Wednesday, March 30, 2016
Dollhouse Miniature Patio Table
I made this simple patio table using circles on the top and bottom, cut out of a cereal box, glued together to make them sturdier and thicker. The long part holding the table up is an empty spool of thread. I glued it together, painted it, and added a matte sealer because I wanted it to look like wood.
The umbrella is a cocktail umbrella, and I am probably going to try to make the top part bigger.
 Here's the cake stand in the cake display case. I also made a few more smaller cake stands, like the red one on the top of the display case. I bought the silver platter at Micheals, and the pink tray is a metallic button.
I think it's starting to look nice. I can't wait to try some polymer clay cakes, donuts, cupcakes, and cookies!

Sadie is happy with our progress on our first dollhouse shop. Rufus is still wondering where the treats are, lol. I'm thinking I should have made a patio that goes all the way around, instead of just on two sides. I like the look of the patio table where I have it, on the green place mat here.
 Here's a shot with my hand across the table from Sadie's hand. She was wondering when we could start on the desserts and I was showing her how hard it is to work so tiny when I have such big hands, lol.
 Sadie and Rufus and I are sleepy; time to say goodnight!
The umbrella is a cocktail umbrella, and I am probably going to try to make the top part bigger.
 |
| Miniature patio table |
 Here's the cake stand in the cake display case. I also made a few more smaller cake stands, like the red one on the top of the display case. I bought the silver platter at Micheals, and the pink tray is a metallic button.
 I think it's starting to look nice. I can't wait to try some polymer clay cakes, donuts, cupcakes, and cookies!

Sadie is happy with our progress on our first dollhouse shop. Rufus is still wondering where the treats are, lol. I'm thinking I should have made a patio that goes all the way around, instead of just on two sides. I like the look of the patio table where I have it, on the green place mat here.


Friday, March 25, 2016
Miniature Bakery Shop in progress
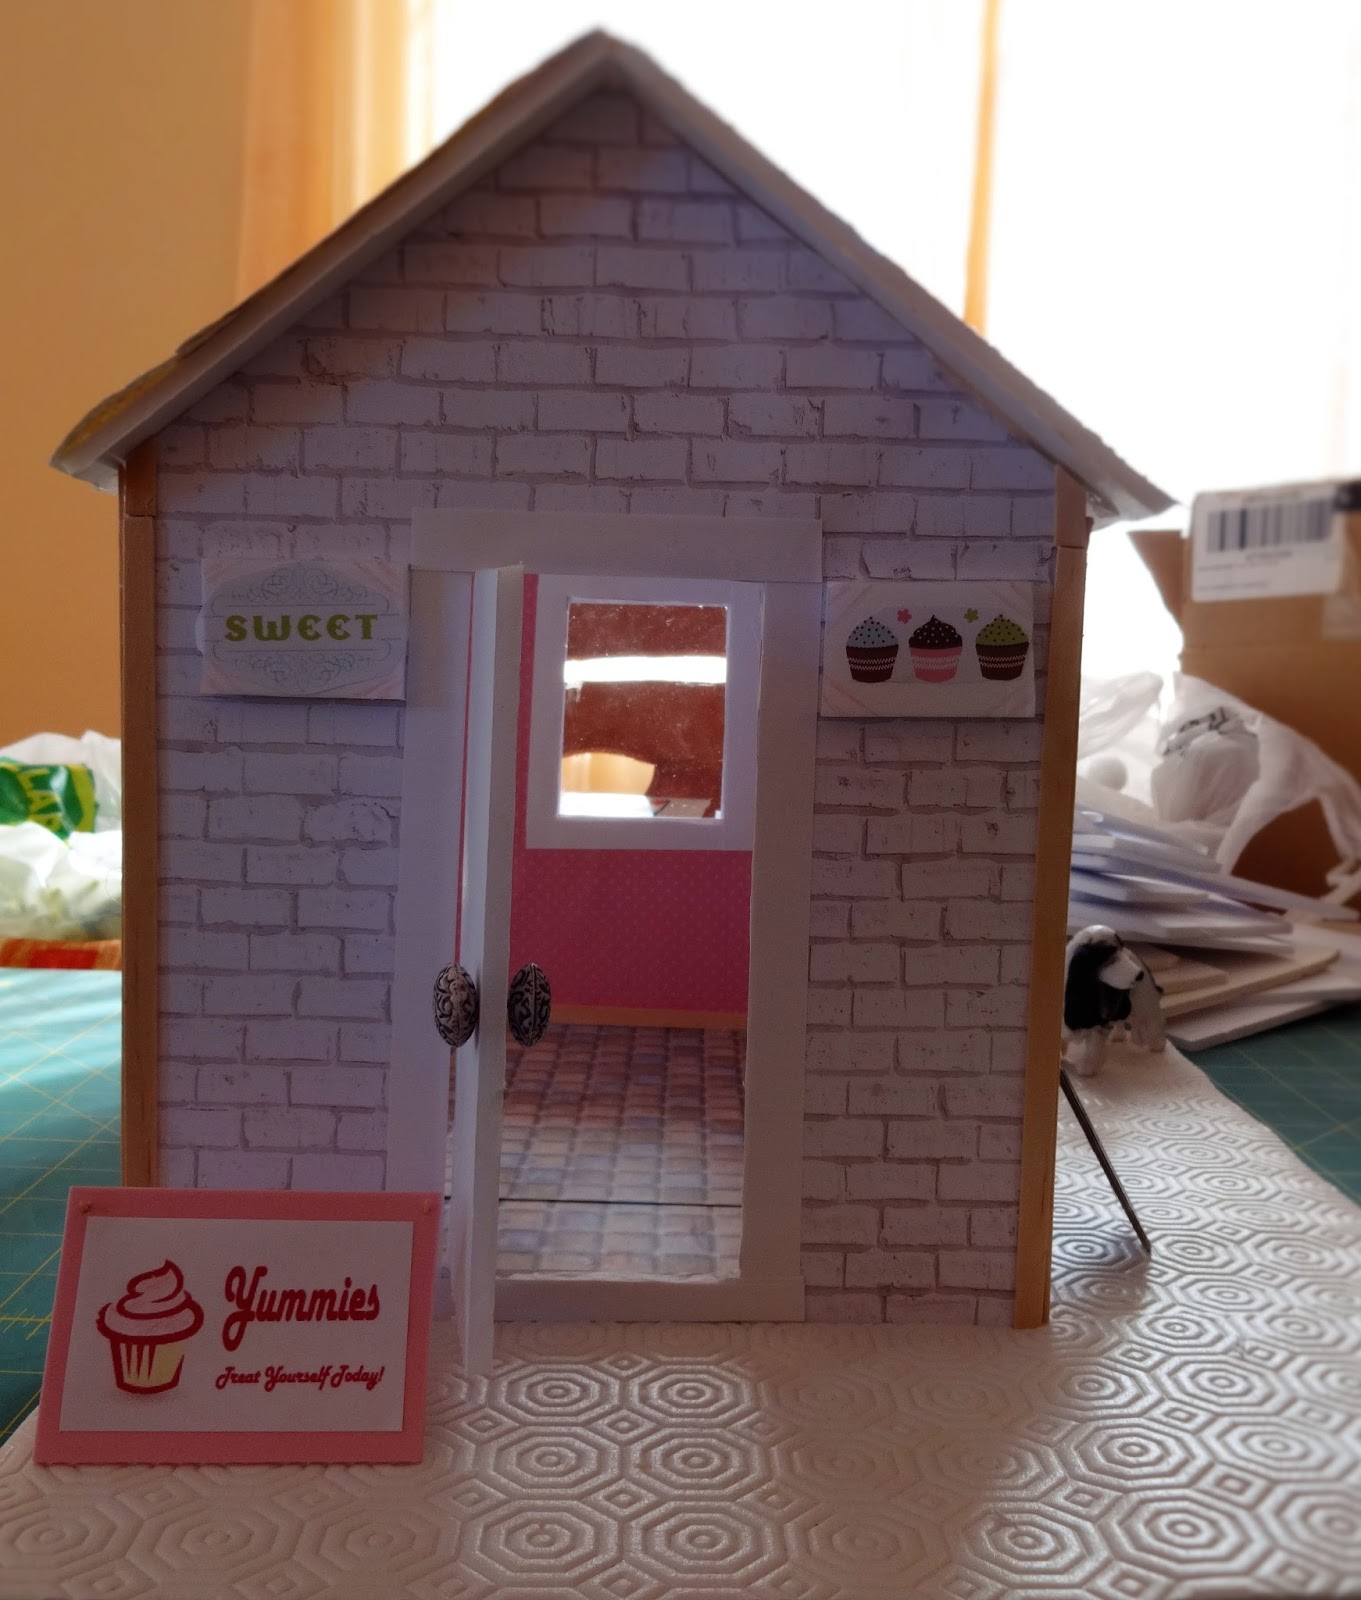
I am having so much fun with this little foamboard dollhouse shop. I added some real wallpaper as roofing. I didn't cut it into strips to look like shingles because I think the pattern already looks roof like enough, sort of thatched.
I love the little chalkboard sticker. I used watercolor paint to write on it and it looks chalky; woohoo. I want to make either a little bench or patio table for the back patio. I also want to make some potted plants, and a sign for the wall.
I used stir sticks for the wood features, and card stock for the door frame. I'm not sure if I should add more stir sticks to the front and back of the roof or not. The patio stones are shelf liner, not paper, but a sort of vinyl-like fabric that comes in a roll.
I printed out some floor tile and am happy with it. I used a matte sealer on it but should probably have used gloss. I love the way the little doll is looking through the window, lol.
I love the mini window. I wish I could get my finger prints off it, lol.
The little doll is telling me we need to build a counter, shelves, a display, and a table and chair set. Yikes, lol. My week of freedom ends tonight so I won't be able to keep my stuff out on the table. I'll only be able to work in fits and starts after today.
 |
| Back of mini shop. |
 |
| Little min shop entrance |
 |
| Mini shop interior. |
 |
| Side of mini shop |
 |
| Mini window |
 |
| Little doll hard at work, lol. |
Subscribe to:
Posts (Atom)