Welcome to my blog

If you enjoy finding a lot of different outlets for your creativity, then we may just be kindred spirits.
This blog is an outlet for my interest in miniatures, crochet, plastic canvas, and many other various arts and crafts.

I also love walking, taking digital photos, and most recently, have rediscovered an old love...bike riding! I purchased an amazing new bike, a comfy Townie by Electra this summer, and have been having a grand time exploring the area as though for the first time. It's like being a kid again!

If you enjoy any of these things too, pour a cup of coffee and tea, sit down, and join me.


Take care!
Kat
Showing posts with label miniature. Show all posts

Friday, March 25, 2016

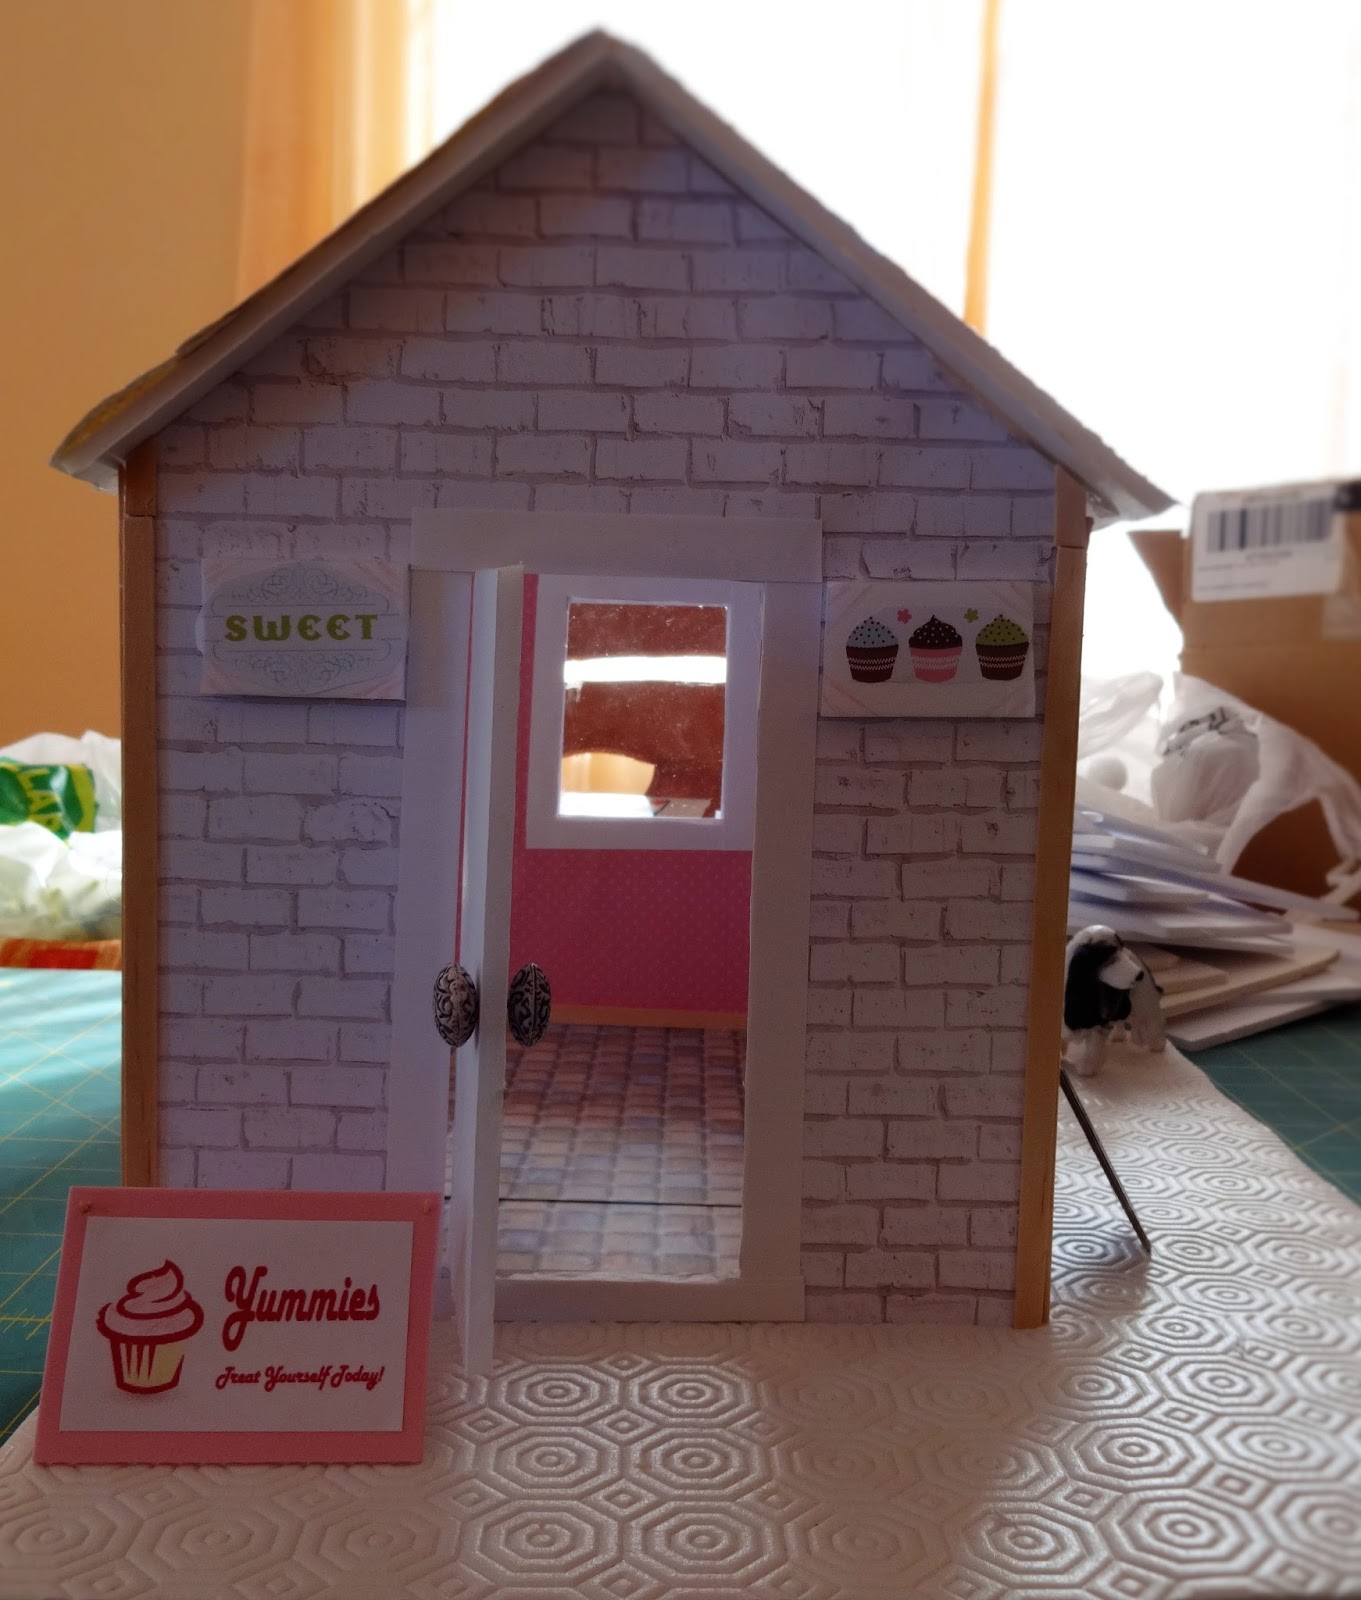
Miniature Bakery Shop in progress

I am having so much fun with this little foamboard dollhouse shop.  I added some real wallpaper as roofing.  I didn't cut it into strips to look like shingles because I think the pattern already looks roof like enough, sort of thatched. 
Back of mini shop.
 I love the little chalkboard sticker.  I used watercolor paint to write on it and it looks chalky; woohoo.  I want to make either a little bench or patio table for the back patio.  I also want to make some potted plants, and a sign for the wall.
Little min shop entrance
 I used stir sticks for the wood features, and card stock for the door frame.  I'm not sure if I should add more stir sticks to the front and back of the roof or not. The patio stones are shelf liner, not paper, but a sort of vinyl-like fabric that comes in a roll. 
Mini shop interior.
 I printed out some floor tile and am happy with it.  I used a matte sealer on it but should probably have used gloss.  I love the way the little doll is looking through the window, lol.
Side of mini shop


Mini window
 I love the mini window.  I wish I could get my finger prints off it, lol.

Little doll hard at work, lol.
The little doll is telling me we need to build a counter, shelves, a display, and a table and chair set.  Yikes, lol.  My week of freedom ends tonight so I won't be able to keep my stuff out on the table.  I'll only be able to work in fits and starts after today. 

Thursday, March 24, 2016

Foamcore Dollhouse

I've been enjoying a week of freedom because I have the house to myself.  Of course, this means I get to "make a mess", aka craft, lol.  I have a cute dollhouse kit but have not tried to build it yet because I'm intimidated by it.  I decided to design my own very simple one room foam core dollhouse to practice on.  I'm so glad I did!
Foam core dollhouse WIP

 First I watched several zillion (or so it seems) videos on youtube, showing how to make and decorate cardboard dollhouses.  MyFroggyStuff on Youtube is awesome, and even though she makes mostly Barbie sized things, I learned a LOT.  Namely, she makes everything look easy when it's not, lol.
Add caption
 For example, in her videos she can cut straight.  Even with rulers, I cannot.  I did my best but my window and door openings are wonky.  I did manage to use some clear hard packaging plastic on this window.  I still have to make window sills. Thanks, Froggy, for teaching me how to do windows!
Entrance
 I love my little entrance.  My door, wonky though it is, swings open and closed on toothpick hinges, and the doorknob also turns and is held in place by a piece of toothpick and some glue.  I had to whittle the toothpick to make it fit into the bead hole.  Never thought I'd do that, lol. Again, thanks to Froggy for teaching me the technique. 
Interior
 I used scrapbook paper for the interior and exterior walls and I wish to heaven I'd have found suitable patio flooring scrap book paper, or roofing scrap book paper.  I found some real wallpaper pieces in the basement that I ma use for shingles but am unsure as of yet.  I kind of like the offwhite roof colour and the wallpaper is more of a tan colour.
Back Patio
I regret not cutting out another doorway on the back, but I wanted one full wall to play with on the interior.  The dolls and table are for scale.
My mini shop logo
I wanted this dollhouse to be a shop, either a bakery/cafe mix so I can experiment with making polymer clay cupcakes, donuts, cakes, cookies, etc.  I couldn't find a nice mini sign so I made one with a free logo maker online.  It's very simple but looks cute when printed on white paper and then glued onto pink foam sheets.

I bought some construction paper but it doesn't have brown or black; I couldn't believe it.  I really wanted black to make a chalkboard.  I found some chalkboard stickers instead but my white pencil crayon wouldn't show up so i had to use water color paint instead. I tried using puff paint but ruined a sticker.  The water colour paint looked like chalk so that was OK.

I still need to finish this and am running out of time.  I'm hoping to get the shingles, flooring, and window and door frames finished today,  and tomorrow I"m going to try to cut out some simple shelves, a display case, and a round table and some chairs. 

I highly suspect that I will be frustrated with making teeny tiny baked goods and will wish I had tried a Barbie sized dollhouse instead.  I would have, but I just don't have the space.  I did buy a faux Barbie at the dollar store and am tickled pink to have a Barbie again.  I bought some several years ago when I made Barbie items in plastic canvas, but I gave them all away.  I really loved that Barbie pool and picnic set.  I hope some little girl is enjoying it.

Sunday, July 20, 2014

Baby house elf in polymer clay

I haven't sculpted for awhile so I thought I'd try my hand at something tiny and whimsical.  This baby house elf is about the size of a strawberry.
polymer clay house elf
 He's not as realistic as my other polymer clay sculpts; I wanted him to be more cartoony.
 He has a wire armature connecting his head and torso, arms, and legs, and wow, was it a pain to sculpt over wire. 


 Here he is with my strawberry plants, in the bottom pot.  As you can see, he's about the size of the ripe red strawberry on top.

Monday, April 7, 2014

Plastic canvas crib, mini toys, and sewing for OOAK dolls


Little outfit for little OOAK polyme boy
 I have a beautiful Kenmore sewing machine that I hardly ever use and I finally pulled it out in order to try to sew some tiny clothes.  I had to learn how to thread the machine and bobbin all over again, it's been so long, and I've only sewn a few items before this, so it was a real challenge, but I'm very happy with the result.
 The white material is from my Dad's old undershirt, and the applique and blue ribbing is from a stained baby shirt.  I still have to add the snaps on the back of the little nightshirt.
Plastic canvas crib with built in drawers
 I made a simple baby stacking toy out of buttons, stacked and glued, with a cut bit of skewer glued on top.  The book is from a printable I found on pinterest, and the blocks are beads.  The doll's name is Phillip but I didn't have enough to spell his name out so settled for Max, lol.
Miniature stacking toy and book
 I really love this crib.  It's from a pattern meant for Barbie and hr babies, and it fits my OOAK polymer clay sculpt perfectly.  The mattress is really just a piece of foam board encased in fabric; same with the pillow.
 I needle felted the teddy bear quite some time ago.  I think it's pretty cool that I made everything in the photo; even the doll eyes.

 The white onesie below is a practice onesie.  It's quite a bit bigger than the little nightshirt I made because it's from an actual baby sized pattern, shrunk by 50 %.  I'm going to try one shrunk by 70% tomorrow.  This was the first time I did sleeves.
Practice doll onesie out of repurposed tshirt

Plastic canvas crib and highschair
Below are some of my polymer clay baby sculpts and the plastic canvas furniture. I'm having so much fun with this!  I can't wait to start my next doll, but first I want to learn how to make fabric doll bodies.
4 of my sculpts so foar

Friday, March 7, 2014

Sculpting baby dolls, 4, First human: It's a girl!


OOAK baby girl
This is my first baby human, and I'm so pleased with her .
Tiny Ooak baby girl
She's another tiny girl, and I really struggled with her facial features as I had to use a 5 times magnifying glass just to see what I was doing.  I should have bought more clay when it was on sale for half off, as I'm running out, and thus have to sculpt small, lol.


i
It took me more than 12 hours to sculpt her head.  I rushed on her arms and legs because I was so tired, and just wanted to get them done, but they still came out OK.  Not perfect by any means, but my camera still selects infant setting for her, lol.

Tomorrow I'll add more, but for now, I just wanted to get some photos of her new outfit, which I finished this evening.  Isn't it adorable?  She chose the colors herself ;-).

Good night!

Thursday, February 27, 2014

Sculpting, doll 2, a fairy


Little Flower Fairy polymer clay, crochet, needle felt 


I am having so much fun learning how to sculpt in polymer clay.  Meet my second creation, tentatively named Sparkles.
Polymer clay doll head 2
 For this doll, I sculpted a bit bigger than my first, and gave her exaggerated features because I'm learning how to do them.  Noses are very hard for me, lol.  I painted this doll with chalk and eyeshadow.  I love fairies and elves and think I will sculpt as many as possible, lol, hopefully improving with each one.
Polymer clay fairy


She was sculpted without molds, in Sculpey Living Baby clay.
 I did her head first, on an armature made of wire embedded in a tinfoil ball, then covered with tape.
Then I sculpted her hands and feet and placed them on an wire armature that i made myself. Then I sculpted her hands and feet again because I ruined them while putting them on the armature :-).

Armature for polymer clay doll
 I needle felted her a body, around the wire.  That was the easiest part of dollmaking, for me.  The wire armature gave me the most trouble.
Needle felted body for polymer clay doll
 She's very bendy and poseable, but with closed eyes her poses are limited.  I want to learn to do an open eyed doll next.
Needle felted armature for polymer clay doll

Poseable polymer clay doll without clothes
 She looks very comfy, doesn't she?  I am very happy with her, considering she's only my second try.

Crocheted outfit for polymer clay mini doll
 I glued on some mohair for her hair.  It's a bit of a mess. I've trimmed the bangs since these photos were taken and she looks nicer now.

I crocheted this cute outfit using embroidery floss instead of yarn, and gave her flower "wings". I didn't have enough of the light green, or I would have made most of the outfit in green, with only a bit of the orange.   I've ordered some crochet cotton in pretty colors and it should be in next week. I can't wait!
Polymer clay fairy asleep


I do like the vibrant oranges and yellows of the embroidery floss, even though they were my second choice for colors.  This little doll makes me smile.  My aunt loved her.

I am really excited about learning how to sculpt because it's allowing me to combine so many of the crafts I already do (needle felting and crochet, reborning (the painting).  I can even make some plastic canvas furniture for the dolls.

Thanks for taking a peek at my flower fairy.  Should I keep calling her Sparkles, or can you help me with a better name?

Take care!