Welcome to my blog

If you enjoy finding a lot of different outlets for your creativity, then we may just be kindred spirits.
This blog is an outlet for my interest in miniatures, crochet, plastic canvas, and many other various arts and crafts.

I also love walking, taking digital photos, and most recently, have rediscovered an old love...bike riding! I purchased an amazing new bike, a comfy Townie by Electra this summer, and have been having a grand time exploring the area as though for the first time. It's like being a kid again!

If you enjoy any of these things too, pour a cup of coffee and tea, sit down, and join me.


Take care!
Kat

Friday, January 10, 2020

I Made Greek Yogurt for the First Time, in my Brand New Instant Pot

Greek Yogurt in the instant pot

First Time Ever Making Greek Yogurt

...in my brand new Instant Pot

My new Instant Pot Viva
My pretty red instant pot Viva is a 6 quart instant pot.  Quarts are a problem because I'm Canadian.  More about that later, lol.

I used THIS recipe. There are tons of recipes out there, but I liked this one because Kayti and Diane were the only bloggers who showed how to inexpensively drain the whey out of the yogurt...which I learned was the only difference between regular and Greek yogurt.  Greek yogurt is simply regular yogurt that has been strained to remove excess whey. Who knew, lol?  Not me, that's for sure.

Anyway, I didn't take photos of every step, and I had to adjust the recipe because I am Canadian and we don't have gallons.  Or quarts. We have litres.

So...our milk comes in bags.  I kid you not.  The outer bag holds three smaller bags, that come to a total of 4 litres of milk.  My math skills suck but my Dad assures me that means 1 inner bag has 1 and a third litres of milk. Trying to convert that to decimals and then to quarts was beyond me, lol.

So, I poured 2 out of the 3 inner bags of milk into the instant pot. According to Dad, that's 2 and 2/3rd litres of milk.  

THe recipe says to hit the yogurt button, then hit the adjust button, until boil shows up on the screen.  My pot does not have the adjust button so I had to reread (for the millionth time) the instructions.  Instead of hitting adjust, I just had to hit the "yogurt" button twice and the word "boil" showed up on the screen.

Then the pot did it's thing. I have no idea how long it took to come to a boil but when I went downstairs to check on it 40 minutes later, it had already done so.  I took the lid off and the milk had little bubbles on it.  I checked the temp with a food thermometer and it read 180 F (I'm used to celcius but the recipe called for 180 F so I was happy. Plus my thermometer showed both F and C, thankfully.

The next step was to take the inner pot out of the instant pot, and place it in a sink filled with cold tap water.  This step was supposed to take 10-15 minutes to cool the milk down to approx. 110.

I live in Northern Ontario, Canada.  It's winter here, and it was -20 C outside when I made the yogurt.  My tap water is basically ice water.  It took 5 minutes to cool the milk.  In fact, it cooled down to 100 C.  I was very worried and immediately pulled the inner pot out of the sink.  I placed it on a towel, dried it, and put it back in the instant pot.

The next step said to hit yogurt and adjust the time to however long you want...they suggested 8-10 hours.  I hit the yogurt button and it said "boil."  So I hit it again until it displayed yogurt.  Then I set the time for 12 hours because I didn't want to get up early or deal with the traffic in our family kitchen in the morning (it's crazy and everyone is mad before they have at least 2 cups of coffee, lol).  Best to avoid that.

So the instant pot did it's thing, and at 11:30 when I checked on it, it was done.

I lifted the lid and checked.  I had a full pot of yogurt. It looked good.  Really good.  

I would have been done right there and then except I wanted Greek yogurt, not normal yogurt.

So then I scrambled because I didn't have the right size strainer.  They were all too small or too big.

I had planned on using cheesecloth draped over a big pot like in the recipe, but my cheesecloth came in one very long, very thin strip!  Like a bandage!

So I improvised.  I grabbed a big pot that we usually use for large soups or for boiling pasta.  Then I put a ramekin in the bottom.  I put my instant pot steamer basket on top of the ramekin and rinsed the cheesecloth in hot water.  Then I draped it over the steamer basket so that it fit snugly. I used several layers so the entire basket was covered.  

Once it was covered, I poured the yogurt into the cheesecloth covered steamer basket.  There was so much yogurt it barely fit in the steamer basket.  It was right up a the top. 

It was suspended above the bottom of the big metal pot by the ramekin, and I hoped it was high enough up to keep the Greek yogurt out of the whey that would drip down into the bowl.  I pulled the ends of the cheesecloth up and over the yogurt and secured it with an elastic so that the entire thing was covered.

I didn't get photos because my family was gathered around giving helpful or not so helpful criticism.

I carried the jerry rigged strainer into the cold storage room, because the recipes suggested chilling the yogurt before draining  OR draining in the fridge.  I'm in Canada and our cold storage room is COLD.  Colder than a fridge, but not quite a freezer, lol. 

I left the yogurt to drain for 3 hours. Then I brought it back up to the kitchen, which thankfully was empty of feuding family members, so I was able to get some photos, lol.

The yogurt in the cheese cloth had shrunken down by quite a bit.  When I first wrapped it up, it was at the very top of the steamer basket and the elastic portion was standing straight up in the middle.
 The ramekin in the big bowl worked perfectly to keep the yogurt out of the whey, and I got a lot of whey.
Above, you can see yogurt had drained so much that not a drop is on the counter.  

 I ended up with more whey than I could keep. The container above holds 5.2 cups and was filled to the brim with whey. I kept it because there are a few recipes that call for it that I may try.
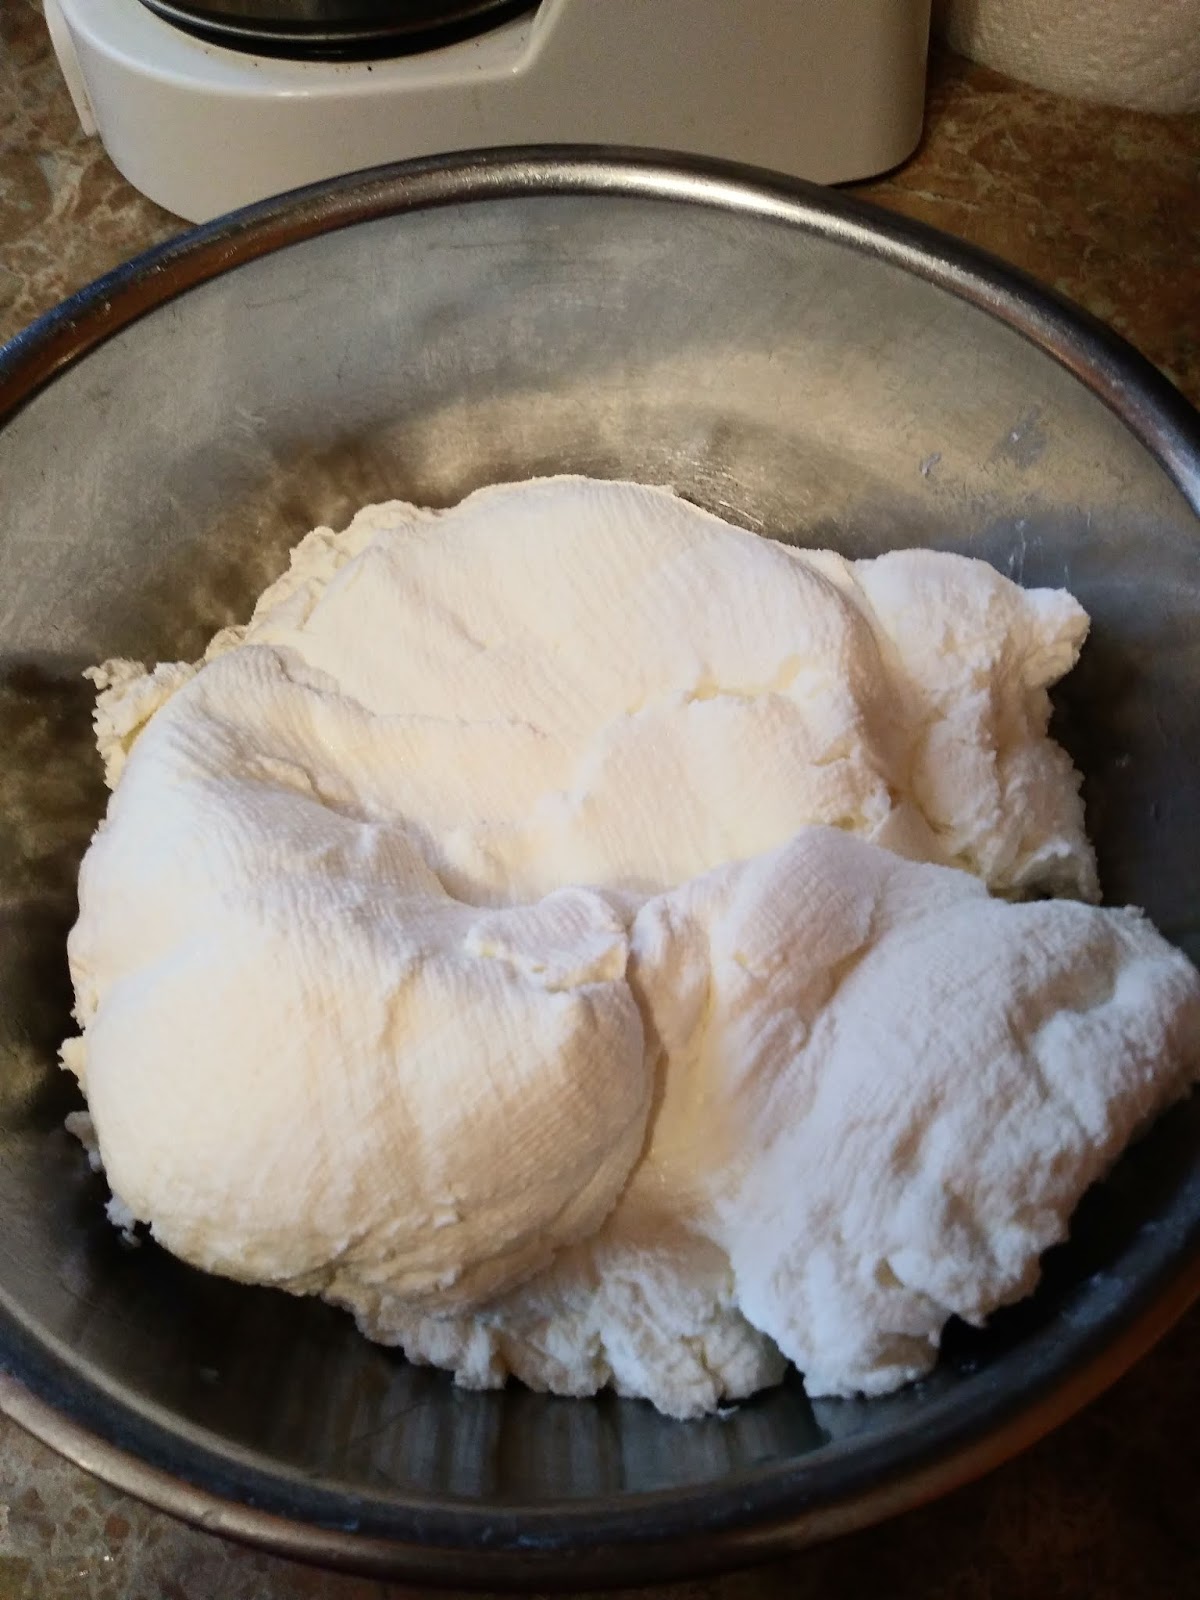
 When I unwrapped the cheese cloth, the yogurt was thick and dense.  Only a few bits stuck to the cheese cloth; for the most part, it rolled out of the cheese cloth into the bowl cleanly, leaving very little behind on the cheese cloth. I was really surprised.
As you can see in the photo above, the Greek yogurt retained the pattern of the cheese cloth, lol.  It was thick...too thick.  I had to add back some whey to make it looser.  It had the consistency of cream cheese or butter before I added a few tablespoons of whey back.  It tasted divine, though. 
 After I added back a few tablespoons of whey, it was much creamier, but still super thick.  Two inner bags of milk made about 6 cups of Greek yogurt.  My container holds 5.2 cups, and I had too much yogurt to fit into the bowl...so I put the leftover in a serving bowl, to be eaten lol.


 As you can see, even after adding back whey, the Greek yogurt was thick enough to stand up a spoon in it.  I added blueberries and dived right in.
And OMG, it was the BEST Greek yogurt I have ever eaten.  

Before tasting it I didn't think I'd ever make this recipe again.  Now that I've tasted it, I can't imagine going back to store bought.

It is super creamy, and not at all tangy. I felt like I was eating blueberries and cream, not blueberries and yogurt.  

Normally I have to add a lot of sweetener to my plain Greek yogurt, but this didn't need any.  It was perfect with the fresh blueberries.  Very filling, too.

I will definitely make it again, but next time, I will only let it strain for 2 hours, not three.

Tuesday, January 7, 2020

Playing Santa for Shelter Cats

Crocheted Mice for Shelter Cats

Playing Santa for Homeless Cats

Ho Ho Ho!  I felt like Santa on Dec. 23rd as I gave out these crocheted mice toys for all of the shelter cats.

My hamster, checking out the crocheted mice
There are 18 crocheted mice in the photo above, and I made 2 more before I delivered them, and still didn't have enough.  The humane society only had 18 cats on their website, but they had 25 cats in the shelter because they hadn't updated their website.  Some of the cats already had toys, so we made sure that the cats who had no toys got the mice first.

I am deathly allergic to cats, and have severe asthma, so one of the volunteers at the shelter helped me give the mice out so I wouldn't get sick for Christmas.  Cats and smoke are my worst triggers, so I had to go fast but I did manage to get some (unfortunately not great) photos.
Pita and his crocheted mouse

Pita
Pita
Pita loved his mouse.  He is a beautiful orange cat with silky fur, and has been adopted!  Yay Pita!

Brucey

Brucey loved his toy, too.  He played with it right away.
Little Grey Kitens loved their crocheted mice


The little grey kittens were brother and sister.  They each got a crocheted mouse, but the little boy kitten wanted both of them, lol.
Chester
 Chester liked his mouse too, but I couldn't get a good photo of him playing with it because he moved so fast, lol. Chester was adopted; yay!
Vivian


Vivian, a gorgeous tuxedo cat, was also adopted.


I also brought in food treats for the cats, two huge packages.  The humane society was very happy, especially for the mice, and asked if I could make more because they get so many cats and kittens who come in with nothing.  I told them I'd be happy to, and asked how many they'd like, and they said, "As many as you care to make".  LOL.  So I'll be busy in the New Year, too.

I couldn't get more photos of the cats because my allergies and asthma were acting up and I didn't want to have to go to the hospital for a treatment, but all of the cats and kittens seemed very happy with their mice.  Unlike the dogs, they preferred the crocheted mice to the food treats. The dogs liked their toys but were more thrilled to get the edible treats, lol.

The guinea pigs liked their treats too.  Unfortunately, there were 25 rabbits in the shelter that I didn't know about because the humane society isn't great about updating their website (too busy taking care of all of the abandoned animals), or I would have bought more treats for small animals.

The mouse pattern can be found for free on Ravelry. It's called Jerry the Mouse.

Playing Santa for the Dogs at the Local Shelter

Giving Crocheted Gifts and Food Treats to the Dogs at the Humane Society

Ho Ho Ho!

I felt like Santa on Dec. 23, just a few weeks ago now.  I had been busy for the months of November and December, crocheting my fingers off, trying to make enough mice for the shelter cats, and food themed toys for the dogs.

It's been so busy this holiday season, so I'm a bit behind in posting and trying to catch up.

I made these toys for the dogs and cats, and also bought healthy food treats for them, and also food treats for the little critters (guinea pigs). 
Toys I crocheted for the shelter dogs and cats for Christmas


Dexter
Dexter broke my heart.  I instantly fell in love with him, and the feeling was mutual, I think.  He was the sweetest, most gentle dog in the shelter.  I have severe asthma and allergies that trigger the asthma, or I would have adopted him in a heartbeat.  Thankfully, he was adopted and now has a forever home. 


To be honest, all of the dogs broke my heart.  I love animals and have had poodles for over 30 years. They are the only kind of dogs I can have.  I wish I didn't have asthma; I'd rescue or foster all of these furbabies if I could. I don't remember the name of the dog above but she was sweet. 

Lilly
Lilly was also very sweet.  She was adopted and now has a forever home.  She loved her crocheted bone, the toy that cracked me and my friends up as I made it, lol. 

Buster

Linus
Buster and Linus loved their hotdog and turkey drumstick toys.  They were both adopted too!
Zeus
Zeus was big and beautiful, a purebred Great Pyrenese.  He found a new home quickly and was adopted. 
Add caption
This dog was also a sweetheart. I don't remember the name and he or she is no longer on the website.  The humane society needs to update their gallery for January, so hopefully he or she was adopted.
Shadow
Shadow was the biggest dog at the shelter, so I gave him the biggest toy; the piece of pie.  He immediately put it on his dog bed, then came back to lick my hand.  I'm not surprised that this big beautiful boy was adopted.

I also bought two big packages of healthy dog treats for the dogs.  They LOVED those even more than the crocheted toys, I think.  Next year I'm going to bake healthy treats for them, but I ran out of time this year.  

Almost all of the dogs I visited have found homes, hopefully forever homes.  I'm so glad :-). 

Crocheted Cheeseburger Dog Toy

Crocheted Cheeseburger Dog Toy

1 piece, crocheted from top to bottom, in rounds.

Crocheted Cheeseburger Dog Toy

I was crocheting toys for the shelter dogs, in a food theme, and couldn't find a hamburger pattern that didn't come in a zillion pieces that needed to be sewn together.   So I made my own.

You can use any size hook and yarn, as long as they go together.  I used super saver yarn and a size G hook. You want to crochet tightly so the stuffing doesn't peek through your stitches, so if you crochet loosely, just go down a hook size.

Materials:

Yarn (super saver) in tan for bun, green for lettuce, orange for cheese, brown for burger, red for ketchup.
Hook (Size G)
Stuffing (fibre fill)
*optional: squeaker insert.  I didn't use squeakers as I wouldn't be around to supervise the shelter dog who got this toy and I didn't want them to choke on it.  If you opt for a squeaker, make sure it's big enough to not choke your dog if he takes the toy apart to get at it. 

Crocheted Cheeseburger

Cheeseburger
*we will be working in rounds, so use a stitch marker to hold your place
Bun: With bun coloured yarn (tan or light brown or gold)
Row 1: 6 sc in magic ring
Row 2: Work 2 sc in each stitch (12)
Row 3: sc next stitch, 2 sc in next st; repeat around
Row 4: sc next 2 stitches, 2 sc in next, repeat around
Row 5: sc in next 3 stitches, 2 sc in next, repeat around
Row 6: sc in next 4 stitches, 2 sc in next, repeat around
Row 7: sc in next 5 stitches, 2 sc in next, repeat around
Row 8: sc in next 6 stitches, 2 sc in next, repeat around
Row 9: sc around
Row 10: sc around
Row 11: sc around IN FRONT LOOP only, break off bun colored yarn, leaving a long tail for sewing in ends, and switch to green (back loop of round 11 will be used later for
burger patty brown yarn)
Row 12:  in back loops only (ignoring empty back loops of previous round, which
will be used for burger patty),
with green yarn, sl st in next st, hdc in next stitch,
dc in next stitch, hdc in next stich, repeat from * around, join with sl st in first stitch,
break off green yarn.
Row 13: Fold back bun so that the green is facing down and the unused empty back loops from round 11 are facing up, attach red (tomato colored) yarn in any loop, sc around, join with sl stich in first stitch of round.
Row 14, sc around (with red), break off red at end leaving tail to sew in.
Row 15-17, With brown (burger) yarn, sc around
Row 18, With (cheese) yellow or orange yarn, sc around
Row 19-20, with tan (bun color), sc around
Row 21, in back loops only, sc around
Row 22, sc 2 together (dec) all the way around
Row 23: sc 2 together (dec) all the way around
Stuff firmly and then continue to dc around until you can’t
anymore. Break off yarn. Sew in ends.
If you want sesame seeds, sew French knots in lighter
color on top bun.
If you want cheese that hangs out, attach yellow yarn to cheese
round and work a row of sc all around, along the outside.

Abbreviations

sc: single crochet
dc: double crochet
hdc: half double crochet
sl st: slip stitch
inc: increase
dec: decrease, 

I only made this pattern once, so there may be errors as I wrote it down as I went.  Next time, I'll take photos of each step, but I was in a hurry so I could get this done and deliver the gifts to the shelter pets in time for Christmas.

Enjoy, and let me know if you make this.  I'd love to see photos.  Please don't steal my pattern and sell it for money, but feel free to use the pattern and sell the finished cheeseburgers :-). 
Crocheted cheeseburger dog toy

Crocheted cheeseburger dog toy


Crocheting for Shelter Dogs and Cats

Christmas Crochet Gifts for Shelter Pets

Christmas crochet for shelter pets

I was busy for the whole month of December and part of November

Crocheting these adorable gifts for the shelter dogs and cats at our local humane society.

The mice were for the cats, and the larger food themed toys (except for the duck, lol) were for the dogs.
My hamster, Dasha, checking out the mice.

My Siberian dwarf hamster, Dasha, gave her mousie seal of approval to the mice, lol.  Actually, she just wanted to fight them.

Crocheted pie, gingerbread man, and cheeseburger
I found most of the patterns for free on Ravelry.com, but all of the hamburger patterns came in a zillion pieces that had to be sewn together, so I just made up the cheeseburger pattern on my own.  I'll share the pattern in another blog post :-).  
Crocheted ice cream cone, donut, and hotdot
 I had a lot of fun making these toys.  I made the hotdog toy for my dog, Mac, years ago, and it brought back bitter sweet memories.  I miss my dogs.  They all had good long lives though, and I have happy memories.
Crocheted dog bone, turkey drumstick, and mallard

       The dog bone cracked me up because I was crocheting mindlessly while watching Netflix, not really paying attention to what I was doing until the pattern told me I had to stuff the bone before I could make the top portion.  This is what I ended up with...
This is the point in the pattern where we're told to stuff the dog bone.  I just about died at what appeared after I stuffed it, lolol.
I just about died laughing.  I shared this pic (above) on Facebook and all of my friends got a good laugh at it too, lol.

Here's a link to my Ravelry project page.  You can find links to all of the patterns I used there.  They were all free :-).

Monday, January 6, 2020

First Recipe in Instant Pot: Home made Chicken Soup

Home made chicken soup

First Recipe ever in my new Instant Pot.

Who doesn't love chicken soup? It's the ultimate comfort food.

New instant pot with home made chicken soup

My throat has been sore and I've been eating too much over the holidays, so today I decided that chicken soup would be the perfect recipe to try in my instant pot for the first time.

To be honest, I was a little anxious about it. I've been reading and watching videos and there's a lot to take in.  

Last night I unboxed my instant pot and it came with a THICK instruction manual. There were tons of warnings about safety in the manual itself, plus 3 extra warnings on cards strewn on and in the instant pot itself.  

Yeah, it's fair to say I was more than a little anxious. I washed the inner pot and all of the accessories first. That part wasn't scary, lol.

I read the instructions manual for the zillionth time, tested the pot by bringing water to pressure, then released the valve.  So far so good. Everything was working exactly like the instructions said it would. I left the hot water in the pot since it was clean, lol, and I was making soup. 

Then I added 3 frozen chicken leg quarters, 4 whole (big!) carrots, 5 celery stalks, including the heads of 2 of them, a handful of frozen fresh parsley, a pinch of basil, a dash of garlic powder, salt, and pepper, and half an onion into the inner pot.  I filled the pot with water to just under the 3/4 fill max line.  That part was easy enough.

Then I sealed the lid by turning it counter clockwise.  Or was it clockwise?  I don't remember but I turned it to the locked symbol.  It made a sound when it was closed properly.  I touched the "soup" button and it turned on, and I added 12 more minutes of cooking time by pressing the + button,  because I was using frozen chicken.

*I don't know if I needed to do that or not.  Some websites said I needed to add extra time if I use frozen chicken.  Others said I don't; the pot will just take longer to come to pressure with frozen chicken.  I decided to err on the side of caution and added the extra time. If anyone reading this knows if I need to add more time or not when using frozen chicken, please tell me in the comments.😀

The pot did it's thing automatically; it's a smart pot, after all...and I went upstairs with a cup of coffee and googled about whether I should use quick steam release or natural release.  Some of the websites said use natural release for 10 minutes, then hit quick release, and others said use only natural release with soups because the water makes too much steam.  So again I opted to go with the safer alternative, natural release. I have no idea if that was the right call or not, lol.

I drank my coffee, read some more, lost track of time, and when I went downstairs was surprised to see my soup was done and the pot had been keeping it warm for an hour and twenty minutes, lol.

It smelled nice, like soup.  But I was still afraid to open it.  I couldn't remember if the little cork thingy needed to be up or down.  It was down...did that mean the pressure was gone and it was safe to open?  I had to google it, and yes, that's what it meant.  So I opened the pot, while my Mom hovered around me sure I was going to die in a pressure cooker explosion, lol.  To be fair, I was pretty worried myself, lol.

Luckily enough, the lid came up easily, the soup smelled amazing, and looked even better. So nice and clear!

First recipe in my new Instant Pot...home made chicken soup
I didn't chop up my veggies or chicken because I like to drink the broth plain, in a cup, and eat my chicken separately, in a plate, but my parents mash up the carrots and chicken and eat theirs all together as soup.  This would be great with noodles or rice, but I'm watching my carbs, although I did cheat a little because my Dad made frittatas and I had one, filled with chicken, ricotta cheese, and a spoon of cranberries.  It was yummy...so yummy I didn't stop to get a photo.  A frittata is like a crepe, a very thin eggy pancake, sort of.  Not a lot of carbs, and I didn't have any carbs today so it was fine.

My parents liked the soup too.  

I found the chicken to be moist and tender and even better than normal boiled chicken, which sometimes tastes dry to me.  Why something boiled in water could ever taste dry, I don't know, lol, but to me, the pressure cooked chicken tasted nicer, even though it was also boiled.  

Anyway, that ends my first time trying to cook with my instant pot.  I enjoyed it and feel a lot less anxious about it.  I'm drinking  a second cup of broth right now, in my big red cup :-).

My biggest red mug, ready to be filled with yummy chicken soup broth.

My Home Made Chicken Soup Recipe  (for 6 quart instant pot)
3-4 frozen chicken leg quarters (leg and thighs attached), or any chicken, really.
1/2 onion
4-6 carrots (add more or less depending on taste)
4-6 celery stalks (add more or less depending on taste)
1 tbsp basil
handful of frozen fresh parsley
dash of salt, pepper, garlic powder (or 1-3 cloves garlic; I was out)
*water (add last)

Put ingredients in instant pot.  

*Cover with water to just under the fill line.  Do not over fill.


Close the lid and make sure it's locked in place. Plug in the instant pot.

Touch the "soup" button.  
Touch the + button to add 10-12 minutes of cooking time (I don't know if this is necessary)

Go relax or do something else; the instant pot will do all of the work.  Check it later (not sure how much later because I lost track of time).  

When the little pressure float valve (the silver thing that looks like a cork) has gone down low, the pressure has been released and it's safe to open the lid.

That's it!  You can add noodles or rice if you like, but I'm low carb (or trying) so I left them out.
You can add fewer or more spices depending on your tastes.  I have a sore throat and wanted a non spicy soup.

*add maggie or parmesan cheese, more salt, etc., in your own cup or bowl to taste. This way it's not too salty for people who don't like salt (like me). 

I like my soup as a broth, so I don't cut up my veggies and I remove the chicken when it's done. You can definitely cut up your veggies and remove the chicken, debone it, shred it, and put it back in.  You can add noodles or rice. That's how my parents like it, so after I take out 2 cups of broth for myself, I add the chicken back in and mash the carrots/cut the celery. 


Instant Pot Viva Unboxing

I Asked for an Instant Pot for Christmas

And Santa, my dear father, ran out and got it for me right away, after getting the go ahead from Mrs. Santa, my Mom, lol.

I opened it on Christmas morning and was thrilled! 
New Instant Pot for Christmas!
I eagerly read blogs and watched YouTube videos showing the many MANY recipes that can be made in the instant pot, but didn't open it because I also got the Oculus Go, a virtual reality headset for Christmas and have been spending a LOT of time in virtual reality, lol.  Also, between Christmas, New Years, and other family parties, the house was FULL of food and I didn't need to cook anything else.

But now the holidays are over so last night I finally unboxed my lonely instant pot. First carried the very large, very heavy box to the dining room table.  The box has a convenient handle so it was no problem, despite the size and weight.
I read the box and discovered that there is a FREE app I can download onto my phone that has over 500 recipes!  I downloaded the app and it's awesome! 
 Next I opened the box lid and saw a list of accessories.  I was very happy to see the instant pot viva came with the trivet, and a few little spoons and a measuring cup.  Both spoons have a slot on the back for turning the steam release valve, which is great because I was worried about how to do that without (potentially) burning myself.

 I took everything out of the box and was impressed by the thickness of the manual and recipe book!  There were warnings literally EVERYWHERE though, which made me worry a bit.
 Here's a shot of everything out of the box and on the table. I wish it hadn't been so dark out because even with the flash, it's hard to show how beautiful the red is.  It's a dark candy apple red.  So even if I suck at cooking in this thing, I'll have something pretty to look at, lol.
 Finally, last but not least, here it is!  The red is so beautiful!  I love my instant pot!
My new Instant Pot Viva
Hopefully I'll figure out how to use it, lol. 


Wednesday, January 1, 2020

Happy New Year 2020!!!

It's 2020!  Happy New Year!

Y2K was 20 years ago!  

1970 was 50 years ago!

How crazy is that, lol?

When I was a little girl, my best friend and I wondered if we'd even still be alive in the year 2000 (we weren't good at math, lol), and now it's 2020.  Wow!

I hope you all had a wonderful Christmas season, or Hannukah, or Kwanza...whatever holiday you celebrate, I hope it was happy.

I have spent so much time with my extended family it's crazy, lol.  Every night we'd gather at a different house...same people.  Today is the last official family gathering as everyone is coming here for supper.  Here we all are, at my 93 year old Uncle Buck's house last night (except for my Dad who took the photo below).
And here's Dad and my cousin Stan.  It was a small gathering last night because everyone is all peopled out, but at Christmas Eve there were about 25 people in that small house, lol.  


I got an Oculus Go Virtual Reality headset for Christmas and my 75 year old Mom and my 80 year old Dad love it.  My 93 year old uncle is coming for supper and wants to try it, so that should be fun.

I also got an instant pot for Christmas and am looking forward to making Keto friendly dishes.  But today, I may just try the New York cheese cake recipe, lol.

I just wanted to pop in to say Happy New Year!