Welcome to my blog

If you enjoy finding a lot of different outlets for your creativity, then we may just be kindred spirits.
This blog is an outlet for my interest in miniatures, crochet, plastic canvas, and many other various arts and crafts.

I also love walking, taking digital photos, and most recently, have rediscovered an old love...bike riding! I purchased an amazing new bike, a comfy Townie by Electra this summer, and have been having a grand time exploring the area as though for the first time. It's like being a kid again!

If you enjoy any of these things too, pour a cup of coffee and tea, sit down, and join me.


Take care!
Kat

Thursday, April 28, 2016

Mini Delphiniums On Trellis

I am loving the way this turned out!
Mini Delphiniums on trellis
I made 9 delphinium plants but only used 5 in the end, 3 blue and 2 yellow.  I used two layers of left over foam core for the "ground", cut into that shape (see above),  and glued together.  Then I glued the trellis onto the foam core shape, and added the flowers. It was difficult because they didn't want to stick into the foam properly.  Once I had them in place, I used my glue gun to glue the in place, and put glue all over. Then I shook some of my dried coffee grounds over the still hot glue and used a toothpick and my finger to pat it into place.  After I was satisfied, I glued the trellis and plants onto the patio.
Mini delphiniums on trellis
 I may still outline the "dirt" with little rocks; I'm not sure yet. 
Foam Core miniature bake shop patio

Foam core mini bake shop patio
 Sadie and Michelle love the flowers.  Rufus would like a tree (or his fire hydrant back) to pee on, lol.
Dolls relaxing on patio
I still have to fill the two big stone planters that I made for the front of the patio, plus the window box.  I made 8 more roses today; 4 golden yellow, and 4 white, to go with the 8 red I made earlier.  I can tell I'm learning as I go as the new roses are nicer.  The leaves are nicer too.  I will take photos later.  I can't wait until my leaf paper punches come in the mail.  I ordered the maple on one Ebay today as it was the only one missing from the set I bought on Etsy.  The set on Etsy STILL hasn't been shipped. 

Wednesday, April 27, 2016

Delphiniums in Progress

I am almost finished with these Delphiniums; woohoo. They've been taking FOREVER, but I also had to take two days off from minis due to being sick.  I don't know what I have; it started with tummy upset and headache, then yesterday I woke up with laryngitis and a super sore throat and that all over achey-flu feeling.  I still feel awful today but decided to work on my minis in hopes they'd distract me.

The tutorial I used for the mini delphiniums  can be found here.
Mini Delphiniums almost finished
I had the flower parts already done, but was stuck on the leaves.  I ordered some mini leaf paper punches but they haven't been shipped yet so I made these leaves using painting tape and wire.  They came out OK but I didn't like the way the wires all looked wound up together, and the green painting tape was too bright so I painted them with my leaf green craft paint.  I like them a lot better now.  I think another layer or two of paint on the stems will help disguise the twisted wires.  If not, I can always try mixing the paint with some glue to thicken it a bit.

Anyway, a few days ago, I prepared a bunch of stems.  I dipped the tips in yellow for other flowers, and for the delphiniums I added those little tubular beads to the wire to make a thicker part.  I think the tutorial called them bugle beads.   I painted them green to match the stem, and think they'd make great cattails if painted brown instead :-).
 I painted some cone shaped coffee filters last week and used the blue and yellow ones for my delphiniums.  I used my mini circle punch and punched a tiny container full of circles.


I used my ball tool (not sure what it's really called, lol) to indent the circles, using a bit of craft foam underneath to help shape them.


Then I glued them to the bead covered portion of the stem, 3 blossoms at a time.
It was fun building them up; I made some taller than the others.


I found a tutorial online, about how to make ivy, and used it to make these leaves.  You can find the tutorial here.
I used this thin wire, and this wide green painters tape.  I put cut pieces of wire, pushed them down onto the sticky portion of the tape, folded the tape so both sides of the wire were covered in tape (see photo below), and drew leaves, then cut them out.
I did two leaves per flower.

Sadie loves her delphiniums.  I'll like them more after the stems get a few more coats of paint.

Sunday, April 24, 2016

Mini Roses

I read and watched what seems like zillions of tutorials about making mini flowers and plants, but in the end, was rescued by my new mini friend Alicia, who sent me me two tutorials on how to make roses.
Mini paper roses
Here is my first attempt.  First I painted some coffee filters with various shades of pink and white.  Then I used my mini heart paper punch to punch out loads of tiny hearts.  I cut some thin wire and glued on little bits of gold embroidery floss to the tip of the wire.
I didn't take photos as I worked, but in the photo above you can see the embroidery floss before I trimmed it down.
Mini Roses
 The first few hearts were very difficult to glue onto the wire because they had to be folded around the embroidery floss.  I added two petals at a time and then let the glue dry.  I used Alene's quick drying glue and it worked great.  It was a lot easier to add more petals once the first few petals were on.
Mini Roses
 I couldn't find a leaf paper punch locally so I ordered some online but they haven't been shipped yet so I tried to make leaves on my own and am not happy with them, so the roses don't have extra stems just for leaves. 
Mini Roses in faux stone planters

I'm happy with the rose blossoms.  I pulled some back with tweezers for fuller roses, and left some wound tightly.

I'm not sure yet if I'm going to make more roses for the planters or not.  I prepared some yellow filter paper, and can use it plain for white roses.  Maybe I'll add a few in other colors, and then try to make some greenery. The roses are just stuck into sponges for now; I have to pick up some styrofoam at the dollar store.
Mini Roses
Sadie is happy with the roses and think they will look nice on her patio. She wants some little trailing plants to hang over the sides of the planters too. Maybe I can use moss for the greenery?

Friday, April 22, 2016

Mini Rustic Stone Planters

I made these rustic faux stone planters today.
Mini faux stone planters


First I grabbed a piece of left over foam core (the stuff I used to make the bake shop).
 I used a ruler to cut straight edges (or try, lol).
 Then I used my craft knife to score brick lines, and another tool (no idea what it's called but it's next to the knife in the pic below) to make the lines wider and round off some of the sharp edges.
 I also cut some edge pieces and did the same for them.
 I applied a silver grey base coat, making sure to saturate the lines.
 Followed by a tan base, and then a white base.  Then I used all three colors and an old, stiff brush and pounced the various colors on until I was satisfied.
 I decided to make two large and two small planters so cut some of the longer pieces in half.  Then I glued them all together using tacky glue.  When the planters were dry, I glued them to card stock so they'd have bottoms.
 After the glue dried again, I cut them out and went over them again with a dry brush, stippling here and there.
Mini faux stone planters
They were super easy to make and I'm happy with the way they turned out.  My Dad said he liked them too.

Wednesday, April 20, 2016

Big Pot of Mini Petunias for the Bake Shop Patio

I'm finished, and although they are cute, I will never make these again, lol.
Mini Petunias
 Making the petals was fine, and even gluing the petals was fine, but the leaves were hell on earth, lol.   I had to punch the hearts out...easy.  Then I had to fold them in half...not so easy but doable.  Then glue them onto the teeny tiny wire that is acting as a stem.  Mission impossible. Even with the use of my tweezers, they did not want to stay in place. I tried regular white glue, clear glue, tacky glue, fast grab tacky glue...it was all awful. 
Mini Petunias
 Despite the problems, little Michelle is thrilled with the flowers.  She even picked one for her hair :-).
Mini Petunias
The patio needed that splash of color to balance the umbrella.  I'm supposed to make climbing roses next, and a window box worth of flowers.  I don't know if I'll have the patience, lol. I'm going to have to get a leaf paper punch; the hearts really are too fiddly for me.

I liked the petunias better when they were standing straight up, as in the above photo, rather than bending them so I'll have to make some stand up flowers like hollyhocks or something.  I really prefer that look.  I think this same tutorial could be used for hollyhocks; maybe using a bigger circle hole punch instead, and different colors.

Mini Petunias, Work In Progress (WIP)

I am working on the tiniest little petunias.  I found the tutorial on the C.D.H.M. website, and it's by Era Anderson Pierce.  It's a great tutorial, and you can find it here.
Mini Petunias in progress
 These are my two practice flowers.  It's hard to tell in the photos, but they are on differently sized stems; the flower with the leaf attached has a slightly thicker, sturdier stem, and the green is a nicer color.  The other one has a fake sparkly green, but it's thinner. 
Mini Petunias in progress
Even with reading glasses and a magnifying glass, I couldn't decide which I liked better so thought I'd snap a few photos and blow them up to see if it makes a difference or not.  I don't know that it does, as the stems will be covered with leaves and flowers.
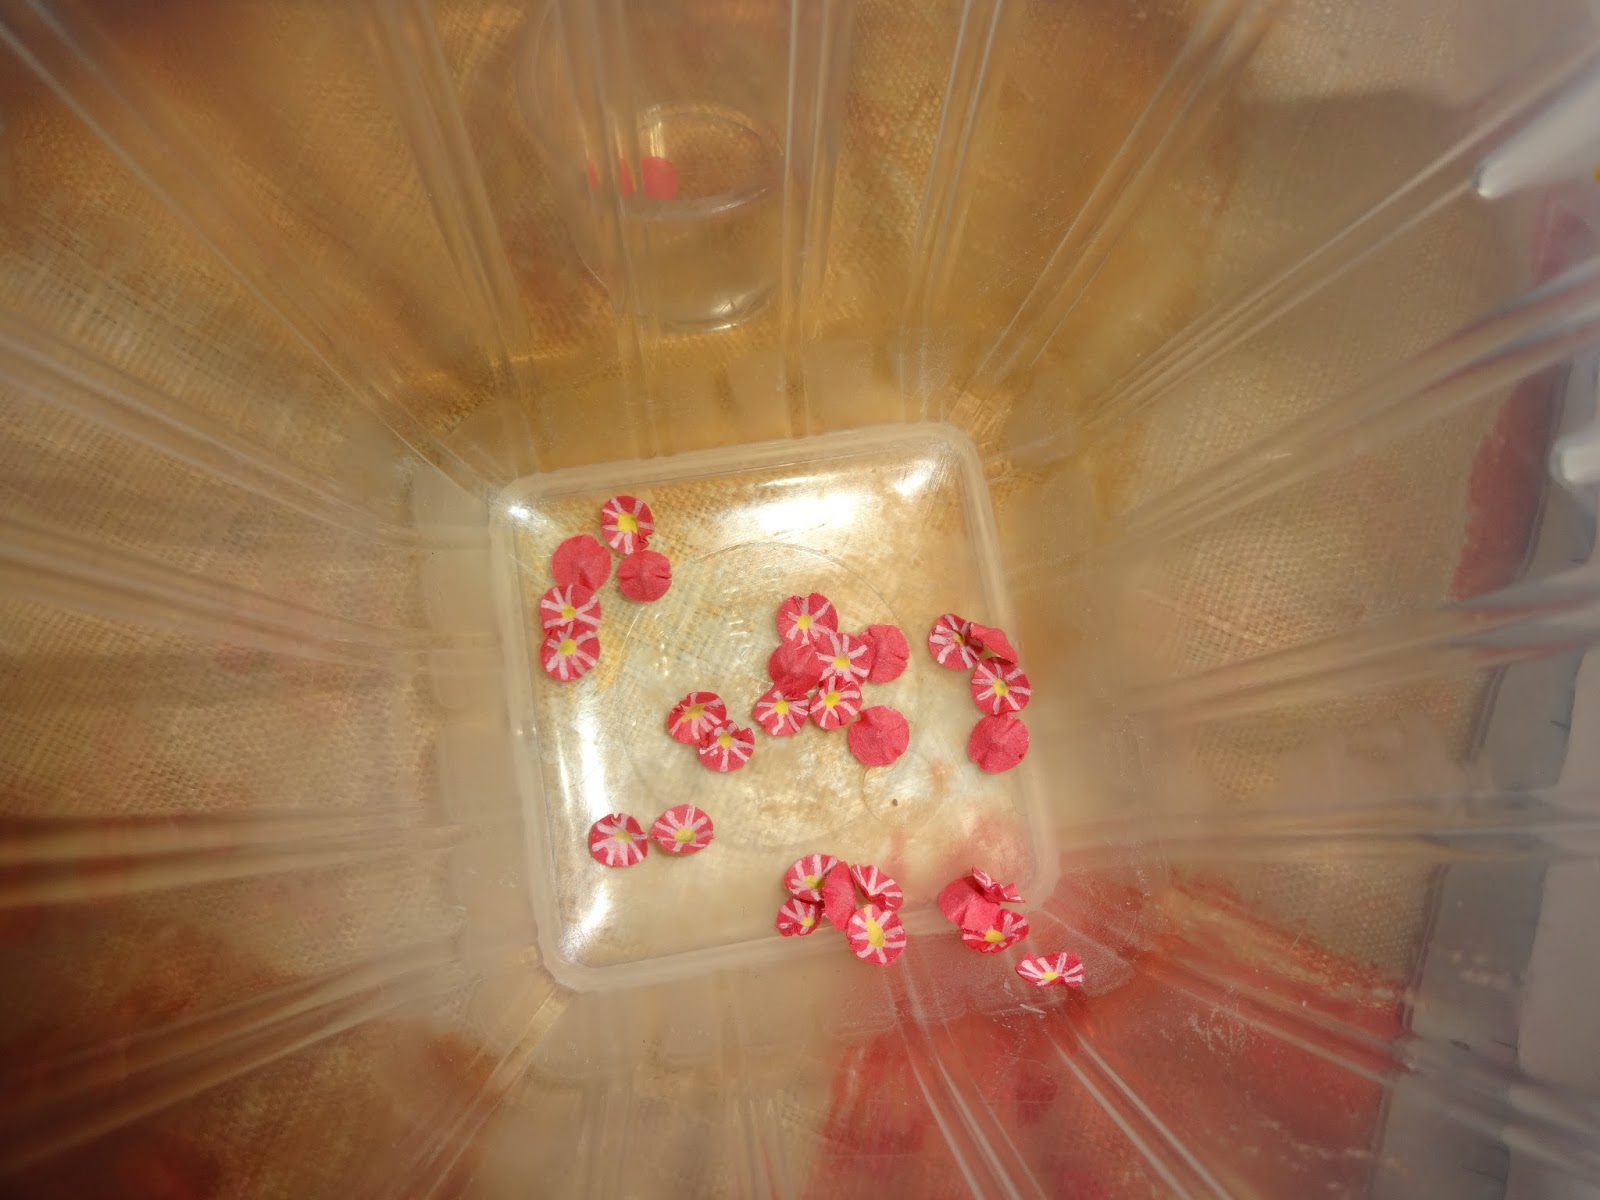
 For step one, I used a small hole punch to cut out red circles.  Then I drew the lines on with a white gel pen, and painted the yellow spots with acrylic paint and a toothpick.  Next I dipped them in water, one at a time and used a dotting tool to push them into craft foam so they more resemble blossoms.  This is all explained in the tutorial I followed (see link above).  I really enjoyed those steps; they were very calming, and I entered a zen like state I think, lol.
 I did have a little heart shaped punch but it was too big.  I was at Michael's yesterday and they were having a big sale on paper punches and I bought this heart punch, along with a corner heart punch together in a set for 11.99, marked down from 40.00!  I also bought a multi flower set (stars and flower shapes) for the same price, also marked down from 40.00.  Below is one of the heart punches in the set.
 After punching out the hearts, I had to fold them in half. I did NOT enjoy this step, lol.  I had to use my pink and black tweezers.  They stay closed unless pinched open and I find them easier to work with than the ones that stay open unless pinched closed.
In the tutorial, we're told to glue the flowers on to the stem, leaving room for the leaves, but I think I'm going to have to glue the flowers and leaves at the same time until I get an idea of how much room to leave for the leaves.  I just wrote leave for the leaves, lol.

I am feeling sad because I had my dog, Mac at the vet yesterday.  He has problems with the discs in his neck and went completely lame 4 years ago.  At that time, I took him to Guelph for an MRI and surgery, and he recovered wonderfully but they were only able to fix one disc and told me he had another one that was problematic.  On Friday I took Mac to Hiawatha Park and he stood up in the truck to put his head out the window.  He's not supposed to do that and I kept telling him to sit but he was having such a good time, wagging his tail, tongue out in the wind that I didn't have the heart to pull over and put him in his crate in the back. I wish I had, as when we got to the park, he went poo and couldn't straighten up again.  He crouch walked back to the car and I was terrified he'd go lame again.  He was fine when we got home, a bit wobbly but otherwise OK. As soon as the vet opened I called them and they gave me the appointment for yesterday morning.  Mac is now taking two of the same pills he was on before, Gabapentin and Tramedol, but the vet didn't prescribe Prednisone even though I asked for it and believe he needs it.  Prednisone is what helps with the swelling.  The vet said he doesn't think there is swelling or Mac wouldn't have gotten better; he'd still be crouch walking or totally lame, but I think that was a warning and he needs the prednisone. The vet didn't even tell me to restrict him to a crate but he did say to keep him calm.  After I suggested the crate, he said to use it if he is too active, and not to take him for walks.  I set up the crate and Mac went in it right away (both dogs were crate trained as puppies and love their crates but I don't keep Mac's crate out all the time because it's so huge and he already has his elevated dog bed taking up so much space in the living room).  Now both the crate and the bed are in the living room and he's taking turns sleeping in either one.  He's being calm so I'm not closing him in, but I will when I go up to have my bath because I don't want him to try the stairs.

I have to bring him back to the vet again in 2 weeks.  Hopefully Mac will be OK but I feel sick that he's not on prednisone as I really believe he needs it.  I know I'm not a vet and I don't know better than the vet but I do know my Mac and I have that gut instinct that he needs it.

He's also lost 8 Ibs over the past year.  I don't know why or how, as he eats like a horse.  He has a bowl of hard dog food out at all times, always available, plus he eats whatever we eat as long as it's dog friendly.  He gets yogurt every day if he wants it, for breakfast, and he gets an egg 3 times a week, plus beef, pork or chicken with vegetables and rice or yams, for supper almost every day.  He gets home made chicken soup almost every day as well.  If he is having tummy problems I'll make chicken and rice, just for him.  He gets sardines and hotdogs for treats, and sometimes I make him home made dog cookies.  He doesn't get enough exercise because he can't, so I don't know how he's losing weight.  The vet wasn't concerned.

I'm so glad I have my minis to distract me and keep me calm and centered.  I have to go let my little guy, Ben out now. Take care.

Monday, April 18, 2016

Easiest Mini Hedges Ever

Simple mini hedge

I made something on my own with no tutorials, lol.  Yay!
I have always loved our privacy hedges.  They surround our family  home on three sides, and I have fond memories of searching  for lady bugs  in the hedges for hours on end with my best friends, Laurie and Maria, when I was a little girl.

I wondered if a hedge would look nice on my patio, to help anchor the topiary trees,  so I made a very simple one.  I used left over foam core from my bake shop, cut it so it would be 4 inches tall (4 feet tall in miniville, lol), and as long as I needed it to fit on the patio.  I cut two pieces in the size that I needed, glued them together with tacky glue, and painted them green and brown so the white wouldn't show through.
 When that was dry, I chopped up some dollar store reindeer and regular moss so it was smaller, coated the foam with tacky glue, and dipped it in the chopped moss.
 After it dried (it took all day), I cut a thick craft stick to fit along the bottom of the hedge, painted it dark brown, let it dry, and glued it to the mossy foam using a glue gun. Then I ran a bead of glue gun glue along the edges of the craft stick and added dried coffee grains to simulate dirt.  I gently pushed the grounds down so they were completely embedded in the glue.  I used the glue gun to stick the hedge with dirt bottom onto my patio and was done.  Sorry I didn't photos of steps along the way, but I was experimenting and wasn't sure how it would turn out.
Rear view of mini hedge
 Here's a view from the back.  I really regret not making a wrap around patio.  I was worried it would be too big, and as this was my first attempt at making something like this, I didn't want it to be huge in case it was awful, lol.  I also wish I would have used craft sticks or cardboard to make the window frames, instead of cardstock.  Oh well, now I'll know for next time.  I still want to add a window box to this side of the house.
Dolls enjoying outdoor patio and hedge
 Sadie is happy with the way the patio is coming along.  Rufus wants to know if I can make his hydrant look more hydrant like, lol, and Michelle is hoping to find a bird or other critter in the hedge.
Mini patio
 I really like the look of the hedge; it balances out the green in the topiary trees.  I may put a low picket type fence around the front corner, where the hydrant is now.  I'm also considering a street lamp, or a bird bath. The hydrant isn't glued on so it's not permanent.
 
Mini patio with hedge and topiary trees
 I'd love to shrink myself down and sit on that bench to read.  It looks so peaceful.

I am loving this, can you tell? Hope you're enjoying the journey with me.

Simple Mini Trellis and Bench

I wanted a trellis and bench for my outdoor patio and ended up making these.
Mini trellis and bench
 I watched a nice tutorial on Youtube for the bench but I changed it because I didn't have the right materials for the supports for hers.  I just sort of winged it using the stuff I had on hand. 
If you do have the right materials though, I'd say follow Joanne's minis advice here.
It's a great tutorial and Joanne's bench is adorable. I used Jumbo craft sticks for my seat area, some wood from Michael's for the legs, and  thin craft sticks for my supports.
Mini trellis and bench
 For the trellis, I used thin craft sticks and thin dowels.  I made it to look like the trellises I had at my old house...16 of them, lol.  Mine were taller (in scale, these are 4 inches so 4 feet; my real ones were 6 feet at the tallest, but 6 inches didn't look right to me here).
Mini patio in progress
 The bench and trellis aren't glued in.  My new mini friend, Alicia told me to wire the trellis and add the flowers to it first.  Great advice.  I'm so lucky to have someone in town who loves minis and has experience. 
Mini patio in progress
 Sophie, Michelle, and Rufus are enjoying the new patio furniture.  I think Rufus is wondering where his fire hydrant went ;-).
 In the above photo I moved things over to see if there would be room for a hedge  behind the bench.  I may try that, or else make another trellis, like this, below:
Add caption
I think that looks pretty sweet. What do you think?
The hedge may look nice too; I already made it; I'm waiting for the glue to dry. 

Mini bench and trellis
 Here are some photos of the simple bench and trellis.  I purposefully used uneven wood for the bench so it would look more realistic.  In the photo below you can see what I did for leg supports. I glued the legs in place first, then added craft sicks on either side of them. I put a LOT of paint in between the space to add extra strength. Hopefully it will work.
Mini bench and trellis
I'm going to go see if the glue on my hedge has dried so I can see if I like it or not.  Take care.