Welcome to my blog

If you enjoy finding a lot of different outlets for your creativity, then we may just be kindred spirits.
This blog is an outlet for my interest in miniatures, crochet, plastic canvas, and many other various arts and crafts.

I also love walking, taking digital photos, and most recently, have rediscovered an old love...bike riding! I purchased an amazing new bike, a comfy Townie by Electra this summer, and have been having a grand time exploring the area as though for the first time. It's like being a kid again!

If you enjoy any of these things too, pour a cup of coffee and tea, sit down, and join me.


Take care!
Kat
Showing posts with label dollhouse minis. Show all posts

Wednesday, July 27, 2016

Miniature Cafe Kit Arrived from China Today!

This morning my dog Mac woke me up barking at the door.  Thank goodness he did because the delivery guy was there and I didn't hear him knock or ring the door bell.  He brought the mini cafe kit that I ordered from banggood.com on July 9th.  Today is August 27th so it took quite some time, but I knew it would, as it was coming from China.  I paid less than 2 dollars extra to insure the package and get a tracking number, which also allowed me to sign for the package as proof that it was delivered, which I think was so worth it.
Mini Cafe kit
 The box is covered with different kits that the company sells.  Mine is the one in the top right hand corner, weirdly named "Dense Feeling Moment" but referred to by me forever after as "Mini Cafe".  I'll probably come up with a different name for the place.
Unboxing kit
 The first thing I noticed was the box this kit came in was super flimsy compared to the box my Pet Shop kit came in.
 The next thing I noticed was the instructions were on very thin paper, and appeared to have been shrunk compared to the pet shot instructions.
Mini Cafe kit parts
 The kit itself seemed OK though, with three little bags of parts, some printables, the main wood pieces, and even glue (which I was told would not be sent).  Glue was also sent in the Pet Shop kit, so I don't know why they say they won't send it, lol.
Instructions
 I pulled out the instructions from the Pet Shop to compare them, and the pet shop instructions (on the left, below) are much larger, with illustrations showing each part in each bag).  The whole page (on the left), showing the contents of a package, was shrunk to the little box midway down the page (on the right). This may be a problem, as I really found the package part descriptions with illustrations to be helpful because so many parts look similar.  Other than the package description shrinkage in the new kit, all else seems to b the same in the instructions. 
Comparing instructions from pet shop kit (on left) to mini cafe kit (on right)
 In the picture below, the Pet shop kit box is the blue one on the left; the new cafe kit box is the yellow one. The blue box is thick and lustrous and a real box with a lid.  The box holds it's shape when opened and it was very convenient for keeping the kit pieces together while i was working.  The new, flimsy yellow box on the right falls apart and lies flat when opened, losing it's box shape completely. It can be put back together again, but without the front lid down, it loses shape.  I guess the company was trying to cut corners and save money.  Hopefully the kit itself will be OK.
Comparing kit boxes
Despite the changes, I am looking forward to starting this kit. 

I have another one on the way, that I ordered 3 months ago, from Ebay (Green's Bar).  That one got lost in the mail and the seller had to resend it. He begged me to choose another kit (one that was in a tin can) and was very unhappy that I wanted the kit I had originally ordered.  He said he had lots of the other kit in his warehouse, but that is not my problem; I wanted the one I ordered, or to get reimbursed so I could order it elsewhere.  I ordered my Pet shop kit from the same seller with no problems so hopefully Green's Bar will arrive without any more problems.

Monday, May 23, 2016

More Mini Cheese Boards, lol

These things are addictive!
Miniature cheese boards in 1:12 scale
  I had to make another cheese board so my smoked Swiss cheese would have somewhere to go. I tried a brown marble this time, and made it curved on one end, with a hole for hanging it up when empty. Considering the cheeses and crackers are stuck on with liquid sculpey, that will never happen.

Miniature cheese board in 1:12 scale

I also made a little bowl of olives, and some olives. I tried black, green, and Kalamata olives.  The bowl was super easy to make; I just rolled a small ball of clay and used a large dotting tool to make the indentation for the inside.
Mini cheese tray with olives
I made some apples...or tried to, lol.  I added them to the big cheese board, along with a slice of smoked Swiss cheese.  Other than that, this board is the same as it was yesterday; I just glued everything in place with liquid Sculpey today.
Mini cheese board
Mini cheese boards with real life hotdog bun
 I misplaced my penny so I put a bun in with the cheeseboards, to show scale. It's quite a small hotdog bun so I took another photo, with my finger, to show scale. 
Mini cheese board with finger to show scale
I had a blast and would love to make even more of these, with some salami next time, lol.
Why are minis soooo very addictive? 

Mini Friends and Mini Cheese Board

I have a mini friend in town who was a facebook friend only, until we decided to meet up in person.  Her name is Alicia and she's great; funny and kind and a pro at making minis.
Mini Visit with New Friend
Before we settled on a time, Alicia suggested that I watch a new tutorial series on Joanne's minis.
The series in in 4 parts and the link takes you to the first, a marble cheese board.  The second part is about how to make crackers, the third is cheeses, and the fourth is fruit.
 Alicia had already made the cheeseboard and cheeses, etc., and suggested I give it a go.  She even brought her own supplies, and gave me some pre-marbled clay to try.
Mini marble cheese boards
In the photo above, the small rectangular board was made with the clay Alicia gave me.  The big rectangular board is made with my own clay (I had to try it myself), and the rounded tray is made with a mixture of both clays.  I used my doll clay (Living doll) for my crackers (and tinted them with chalk pastels).

It was so nice to meet in person and we spent hours making minis, talking, and laughing.
Alicia had already done the cheese boards so she made pies for her Mom's mini bakery.
Alicia's pies
Unfortunately the pie crust on one broke when she tried to take it out.  She didn't want to bother with checking the convection oven's temperature even though I told her the temp was wonky and couldn't be trusted (I always test it with an oven thermometer so I can find the right temp to bring it up to where it needs to be).  She bakes in her oven, but I'm living at my parents right now and don't want to use their oven.  I know polymer clay is supposed to be safe but I don't want to take a chance.  Plus neither the bird nor I can stand fumes (it could kill her, and make me sick) so I use my convection oven in the basement, with the window opens.  It all worked out in the end though.
Mini Cheese Boards with Crackers
Here's Sadie, posing with the cheese boards.  She probably thinks she's getting a cheese shop next, lol, but I really just use her to make sure I'm making things t o scale, as best as I can, anyway.


Friday, April 22, 2016

Mini Rustic Stone Planters

I made these rustic faux stone planters today.
Mini faux stone planters


First I grabbed a piece of left over foam core (the stuff I used to make the bake shop).
 I used a ruler to cut straight edges (or try, lol).
 Then I used my craft knife to score brick lines, and another tool (no idea what it's called but it's next to the knife in the pic below) to make the lines wider and round off some of the sharp edges.
 I also cut some edge pieces and did the same for them.
 I applied a silver grey base coat, making sure to saturate the lines.
 Followed by a tan base, and then a white base.  Then I used all three colors and an old, stiff brush and pounced the various colors on until I was satisfied.
 I decided to make two large and two small planters so cut some of the longer pieces in half.  Then I glued them all together using tacky glue.  When the planters were dry, I glued them to card stock so they'd have bottoms.
 After the glue dried again, I cut them out and went over them again with a dry brush, stippling here and there.
Mini faux stone planters
They were super easy to make and I'm happy with the way they turned out.  My Dad said he liked them too.

Wednesday, April 20, 2016

Big Pot of Mini Petunias for the Bake Shop Patio

I'm finished, and although they are cute, I will never make these again, lol.
Mini Petunias
 Making the petals was fine, and even gluing the petals was fine, but the leaves were hell on earth, lol.   I had to punch the hearts out...easy.  Then I had to fold them in half...not so easy but doable.  Then glue them onto the teeny tiny wire that is acting as a stem.  Mission impossible. Even with the use of my tweezers, they did not want to stay in place. I tried regular white glue, clear glue, tacky glue, fast grab tacky glue...it was all awful. 
Mini Petunias
 Despite the problems, little Michelle is thrilled with the flowers.  She even picked one for her hair :-).
Mini Petunias
The patio needed that splash of color to balance the umbrella.  I'm supposed to make climbing roses next, and a window box worth of flowers.  I don't know if I'll have the patience, lol. I'm going to have to get a leaf paper punch; the hearts really are too fiddly for me.

I liked the petunias better when they were standing straight up, as in the above photo, rather than bending them so I'll have to make some stand up flowers like hollyhocks or something.  I really prefer that look.  I think this same tutorial could be used for hollyhocks; maybe using a bigger circle hole punch instead, and different colors.

Monday, April 11, 2016

Mini Napoleon Pastries and Mini Books

Napoleons!  I love them, and when I saw  this  tutorial on Youtube, I had to try it!
Miniature Napoleons and books
These look so simple to make but were actually very fiddly.  It would be easier if I had one of those long straight cutters that look like metal rulers that everyone has, that or a little rectangular cut out.  I had to cut my rectangles myself and it is not easy to get them to match, even when I stacked them.  I think next time I try them I'll do it differently and do a big sheet of dough color, followed by the filling, dough, filling, dough, and then cut them after they're stacked.   I guess I should have said I'll layer them before cutting them, lol. That sounds better.

I made the books the other day, and they look so sweet in this scene.

 My white icing isn't white enough; I'd like it whiter so I guess I should have added more white chalk pastel to the Liquid Sculpey.  I used a  toothpick to spread the white "icing", and a sewing pin to do the chocolate lines.  One of my chocolate lines seems to have spread while baking, or maybe I smudged it when I put it in the oven?  I'm not sure.
 Here's a photo to show the size of the treats. 
 The look nice on my button cake stand, lol  I used the sewing pin to give texture to the pastry layer, and a dotting tool to do the custard layer.  I need more practice with the dotting tool.
Sadie is happy with her new cookbooks, and she says the Napoleons are delicious.

I also made these two handles for my sewing needle and my sewing pin, so they'll be easier to hold.  I used scrap clay that I cut from the sides of the Napoleons and just held them so they were comfy so they're not pretty, but they're made exactly for my grip, lol.  I put a bit of liquid sculpey at the base to help hold them in place after they're baked, and it pooled at the bottom while it baked, but that's OK.

That's it for today.  My little dog Benji is whining for his 8 PM treat (he does this every night at  8 on the dot, lol.
Take care.

Saturday, April 9, 2016

Mini Cookbooks, Michaels Haul, and More

I started working on these little cookbooks last night and am finishing them up tonight.  They are a bit big I wanted them to be like those big cookbooks that I have.  They're so cute.  They won't open or anything. They still need more coats of mod podge.
Mini cookbooks
I had a strange afternoon today.  I love feeding the birds, and when I went out with the dogs, I stood watching the birds.  Then I noticed a blackbird, a Grackle, to be exact, struggling with something as it attempted to fly up to my neighbor's roof.  It was a mouse! I said, "Oh no!  Let it go!" and the bird dropped the mouse.  The mouse landed on the recycling container, bounced off, and ran under it.  It had quite the fall so I hope it's OK.  I felt awful for the mouse and the bird both.  I felt sorry for the mouse and was glad it got away, but I also felt guilty for startling the bird into losing it's dinner.  We all have to eat.  The grackle wasn't pleased with me I don't think; it landed in the tree above me and I swear it glared at me, lol.  I told it that I would feed it a hotdog when I came home.  Then I went to Michaels to try to find marbles and bought all this, lol:
Michaels haul
 I had two coupons, one for 50 percent off, and one for 40 percent off, so I bought the pasta machine for clay.  I hated doing it because I already have one, but it disappeared when I moved 3 years ago.  I'm sure it's in the garage but there are so many boxes and I can't get to them all.  I held off for a long time, but justified getting a second one because I used the 50 percent off coupon.

I also finally remembered to buy the circle ruler thing that I've been wanting, some white sand (for sugared donuts, lol), some extra large craft sticks, a bag of little glass things, including marbles, and a bag of bigger glass things that look like cabachons but are not.  I also couldn't resist getting a bag of miniature coke bottles.  I don't think that's something I could make...not yet, anyway.  I love diet coke, and the mini bottles were only 3.99 and there are 6 pieces (I think).
Real life treats
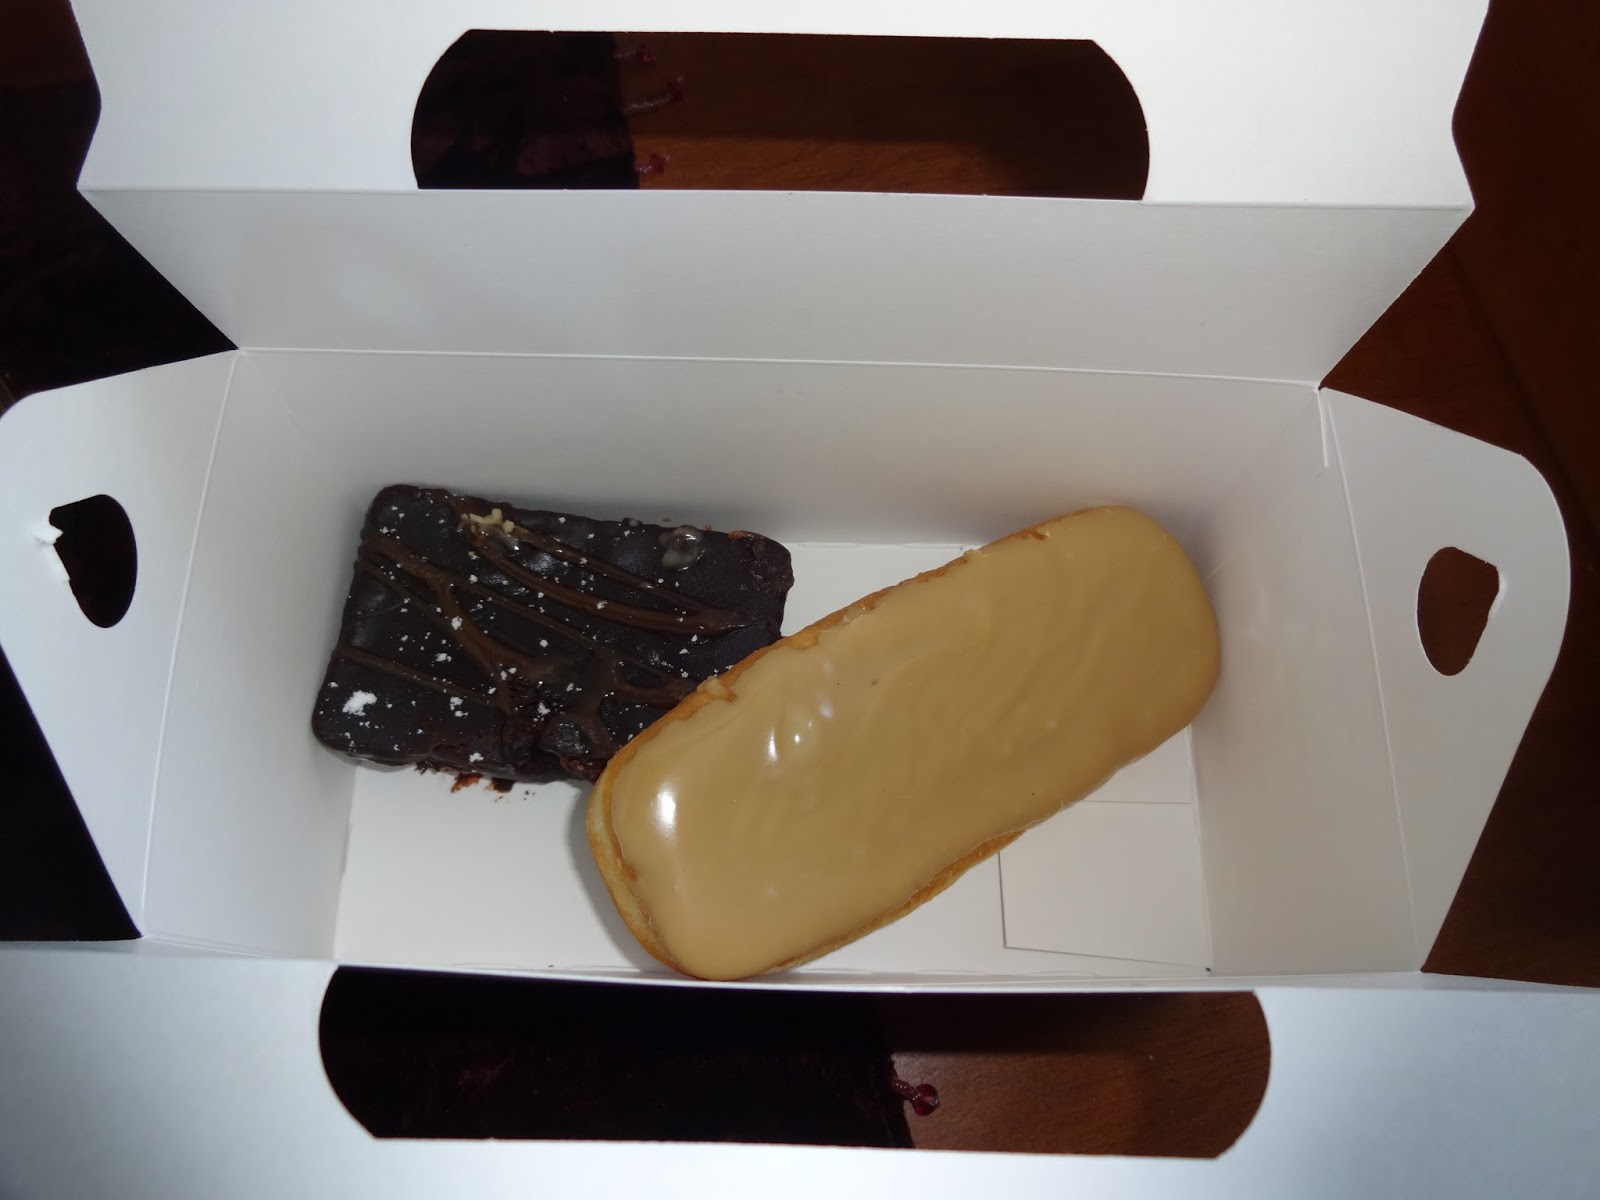
 All of these polymer clay donuts, cakes, pies, and cookies have made me hungry so I stopped at the donut shop on the way home and bought a brownie and a maple glazed Long John.  To die for, lol.
First attempt at miniature polymer clay bowls
 When I got home, the Grackle was still waiting in the tree (or else another one was) so I broke up a hotdog and tossed it onto the roof of the shed.  It watched me do it but I don't know if it recognized a hotdog as food.  If not, the seagulls or crows will eat it. 
Mini polymer clay bowls
 I was watching a Youtube tutorial earlier about how to make bowls by cutting out a circle of clay and then forming it around half of a marble.  I can't find the tutorial now but I remembered it and gave it a try. 
Edit: I think this was the tutorial here.

The bowls came out so cute but the inside, where they baked against the glass, is much prettier and glossier than the outside.  Also, some of the bowls broke when I took the marble out. I don't know if they were overcooked, undercooked, or if I just used the wrong kind of clay for the ones that broke (the red and white marbled ones).  The one I made out of my Living Doll clay came out nice and is a lot sturdier, but it is also thicker.  I'm going to have to find out which clays I like best. 
 You can see the broken pieces here.  I'm going to keep them, and chop them up so that they look like bits of peppermint candy.  I can use them as topping later.

I rebaked the bowls to see if they'd become stronger, but I still don't know if they have as I haven't gone down the basement to get them yet.  I also still need to sand the edges.


Thursday, March 31, 2016

Teeny Tiny Mini Clocks

These little mini clocks were so simple to make.  I found the tutorial on dollar store crafts; sorry I can't find the link again.  Basically you print out a clock face (shrink it in microsoft word), glue it onto a rimmed button, and glaze with 3 dimensional stuff that makes it look like a window.

Edit: The 3 dimensional stuff is called Mod Podge Dimensional Magic.  Sorry for my bad memory and being to lazy to get up to check when I first wrote the blog, lol.  I bought it at Michaels.
You can get it online too: Dimensional Magic on amazon .
Miniature Clocks
 I did the little brown one first and the dimensional stuff overflowed and got all over.  Then I did the other three, each of which has a cupcake on the face.  In real life clock numbers 2 and 3 are nicest, but in photos the 1st one is nicest; weird!
Sadie couldn't decide which one she liked best so she bought them all.  I wonder which one she'll choose?  Poor Rufus is staring at the empty cake platter.  Soon Rufus, soon. ;-)