Welcome to my blog

If you enjoy finding a lot of different outlets for your creativity, then we may just be kindred spirits.
This blog is an outlet for my interest in miniatures, crochet, plastic canvas, and many other various arts and crafts.

I also love walking, taking digital photos, and most recently, have rediscovered an old love...bike riding! I purchased an amazing new bike, a comfy Townie by Electra this summer, and have been having a grand time exploring the area as though for the first time. It's like being a kid again!

If you enjoy any of these things too, pour a cup of coffee and tea, sit down, and join me.


Take care!
Kat
Showing posts with label minis. Show all posts

Friday, June 3, 2016

Completed Miniature Pet Shop Kit in 1:24 scale

I finished my little Pet Shop Kit; woohoo!
Pet World DIY miniature kit in 1:24 scale, completed
 My Dad had to do the wiring for me, and it looks so great all lit up at night!


 I am really pleased with the way it came out,! 
Sadie had to duck down to take a look.  She says she'd like a 1 inch scale pet shop so she can go shopping for Rufus.  I told her I'd think about it ;-).

In the meantime, I ordered another DIY storefront shop kit from China; called Green's Bar.
This is what it will look like:
Sorry for the grainy image, but it's going to be so cute! It has already been shipped but it's coming from China so will probably take a month to get here.


Monday, May 23, 2016

Mini Cheese Board with Crackers and Cheese

I worked hard all weekend and made more crackers and some cheese to go with my cheese boards.
1:12 scale miniature cheese board with crackers and cheese
Doesn't it look yummy?  I had to stop and eat cheese after seeing the photos, lol.  In person, the cheddar just looks like little tiny specs to me, but once the picture is enlarged like this, it looks good enough to eat.  My crackers are a little too thick, but still make me want to eat them, lol.  That's so bad; talk about food obsessed, lol, that polymer clay food makes me hungry.

1:12 scale mini cheese boards with cheese and crackers (polymer clay)
I made 3 trays in total, soda crackers, ritz crackers, and 4 different kinds of cheese.  The swiss cheese was still in the oven when I took these photos.  I mad eso many crackers that I had to find printable cracker boxes online so I could store the extras.  I even made little bags out of waxed paper to fit inside the boxes.

Mini Cheese Boards

Mini Cheese board with cheddar
Mini cheese boards
I had a blast making these. 
Thanks for visiting!

Mini Friends and Mini Cheese Board

I have a mini friend in town who was a facebook friend only, until we decided to meet up in person.  Her name is Alicia and she's great; funny and kind and a pro at making minis.
Mini Visit with New Friend
Before we settled on a time, Alicia suggested that I watch a new tutorial series on Joanne's minis.
The series in in 4 parts and the link takes you to the first, a marble cheese board.  The second part is about how to make crackers, the third is cheeses, and the fourth is fruit.
 Alicia had already made the cheeseboard and cheeses, etc., and suggested I give it a go.  She even brought her own supplies, and gave me some pre-marbled clay to try.
Mini marble cheese boards
In the photo above, the small rectangular board was made with the clay Alicia gave me.  The big rectangular board is made with my own clay (I had to try it myself), and the rounded tray is made with a mixture of both clays.  I used my doll clay (Living doll) for my crackers (and tinted them with chalk pastels).

It was so nice to meet in person and we spent hours making minis, talking, and laughing.
Alicia had already done the cheese boards so she made pies for her Mom's mini bakery.
Alicia's pies
Unfortunately the pie crust on one broke when she tried to take it out.  She didn't want to bother with checking the convection oven's temperature even though I told her the temp was wonky and couldn't be trusted (I always test it with an oven thermometer so I can find the right temp to bring it up to where it needs to be).  She bakes in her oven, but I'm living at my parents right now and don't want to use their oven.  I know polymer clay is supposed to be safe but I don't want to take a chance.  Plus neither the bird nor I can stand fumes (it could kill her, and make me sick) so I use my convection oven in the basement, with the window opens.  It all worked out in the end though.
Mini Cheese Boards with Crackers
Here's Sadie, posing with the cheese boards.  She probably thinks she's getting a cheese shop next, lol, but I really just use her to make sure I'm making things t o scale, as best as I can, anyway.


Tuesday, May 3, 2016

New Project! Mini Pet Storefront Kit

I bought this kit on ebay and it's really cute, and really small, lol. Mine is the Pet World one, circled in yellow below.  If this works out, I'd also like to get a few of the other kits; namely Green's Bar and the little restaurant. The seller shipped quickly considering it came all the way from China.  I'll add the link but I don't know for how long it will work; I guess it depends on how many more kits s/he has.  You can buy your own mini Pet World kit here.
Pet World Mini DIY kit
 The box was shipped from China and this package was inserted into a larger box with lots of protective wrapping.  This kit also had bubble wrap around the parts inside, but I took the bubble wrap out and placed it in the lid for the picture. 
Pet world mini DIY kit
 The kit is extremely good quality, the wood is so much better than my Greenwood kits which I plan to work on this summer.
Pet world mini DIY kit contents
 This kit came with the room box, the cover, a flooring, 3 bags full of little bits of wood, doodads, etc., glue, wiring, a battery holder but no battery, tons of very tiny printables, and some clear sheets for windows.
mini dog
 In the photo above you can see the little dogs. The kit was supposed to contain 2 but they sent me three. They are very cute.  I like the white one best.
 When I saw how tiny the printables were, I scanned them to my computer so I could do practice folds of the smaller pieces.  I am not used to this scale at all; I thought 1:12 scale was small but this is 1:24th scale so even smaller. 


Pet World DIY kit, roombox portion
 There's the room box portion of the kit in what looks like my giant hand, lol.
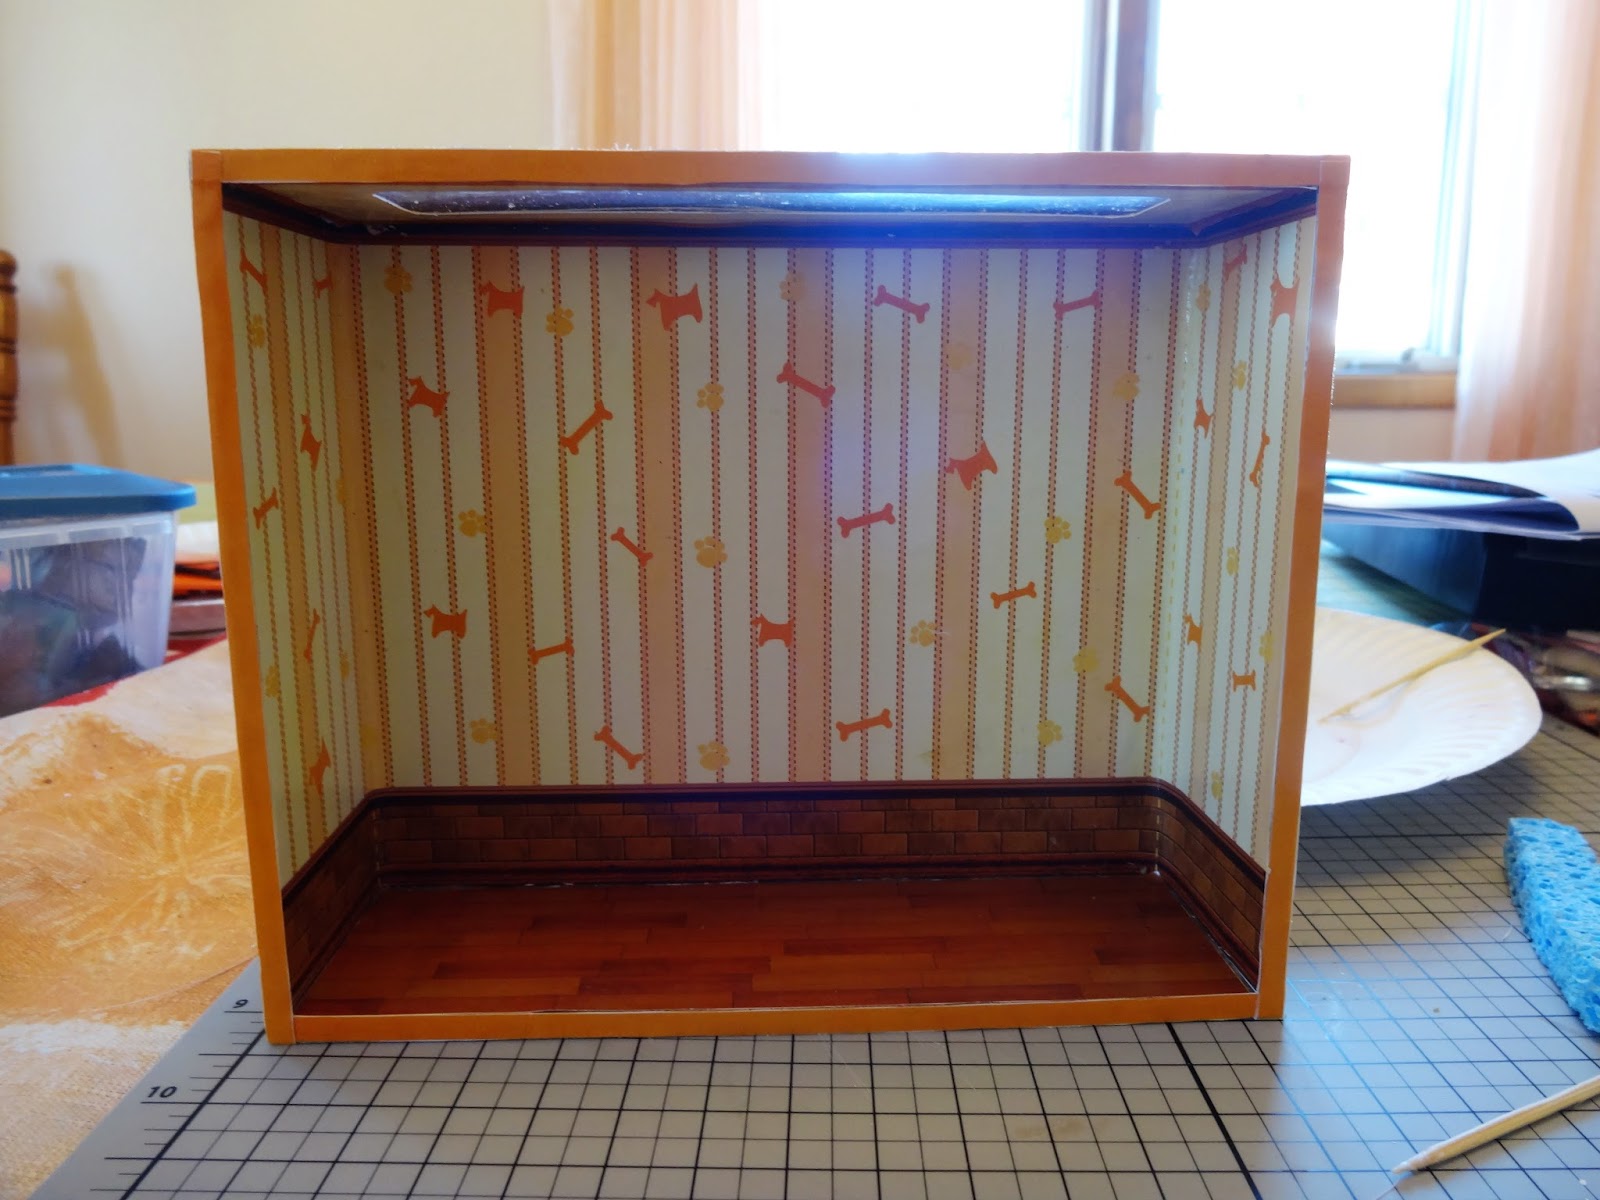
Pet World Mini DIY kit step 1 complete
 In the above photo, you can see step 1 completed.  Basically I had to cut out the wallpaper, roof and floor paper, and tiny ribbons of orange side paper and glue them on.  The roof also had a strip of clear plastic that looks a lot like the old overhead screens.  The glue still wasn't dry when I took this photo; hopefully it will dry clear.  I was actually surprised to get glue at all because in the Ebay auction I was warned that they can't ship the glue and batteries.  I didn't get the batteries but the glue was a nice surprise.
Pet World Mini DIY kit English instructions
The English instructions are OK; easy to understand but the writing portion is pretty sparse.  The photo portion, however is wonderful and tells you exactly what to do, step by step.  I hate cutting things out so this section was very tedious for me, but it looks so cute I don't mind in the end.

For the next section, the Storefront, I have to attach the hinges and screws and I'm a bit worried about that.  I don't know where my tiny screw driver set is.  If I can't find it I'll have to run to the dollar store to get a new set.

So, that's it for now.  It's a very cute kit, and I got it for a great price (20 bucks).  I've seen it sell for 60 on Amazon so if you get one, shop around first.

Thursday, April 14, 2016

Miniature Curtains, Cash Register Stand, and Furniture Placement


My little foamcore doll shop is coming along!  Last night I glued in the shelf unit and the little table, and added curtains.  I put little foam corner decorations on the top of the shelf unit and they were perfectly even when I glued them on but I noticed they've shifted a bit.  I guess I squished them when I put them on and they became unsquished, lol.  Next time I'll use card stock.  Live and learn :-).

 Sadie LOVES her curtains, and was so busy rearranging things and decorating that she brought her little daughter, Michelle, to help. 
 The cash register counter was made from one of the dollar tree dressers I bought the other day.  I turned it upside down and backward, lol, and decopaged it with mod podge, a card I designed to use as the store name, and bits of tissue paper.  I'm happy with the way it came out.  I used two of the little legs to hold miniature napkins in place. 
Dollar tree miniature dresser turned upside down and backward and mod podged into a counter, lol.
Foam core mini bake shop in progress.

Foam core mini dollhouse cake shop in progress


I'm loving this little shop, and my favorite part is learning how to take every day or found or dollar store items and turning them into minis.

So far I've learned that dollar store foam core sheets make great structures.  Scrap book paper makes great wallpaper.  Buttons make great clocks and cake trays.  Mod podge is wonderful.  Cutting and folding printables is frustrating.  Ribbon, dowel, and lace make cute curtains.  Popsicle sticks make great shelf units.  Buttons make good doorknobs.  Beads make great computer monitor stands. My printer eats ink like it's starving. Cereal boxes can be cut and glued into layers to simulate thin wood.  Scissors get dull too quickly.  I have more glues than I ever thought I would. There is no such thing as a cheap dollhouse. And last but not least; I still like playing with dolls, lol. 

Tuesday, April 12, 2016

Huge Dollar Store Haul

I went to the Dollar Tree to buy shears to see if they work better than scissors at cutting craft sticks, and went a little crazy, lol.

I was thrilled to find our Dollar Tree FINALLY had some dollhouse furniture.  I kept hearing about how I could find minis at the Dollar Tree but we never had any here...until now.
Dollar tree furniture

 I bought every item they had, lol, and ended up with what you see here.  I thought the table was a dining table but it is too short, so maybe it's a big coffee table?

Sadie likes it anyway, lol.  She's very happy to have furniture that is not made from cardstock or craft sticks :-).

 I don't know if you can see, but this dresser above was cut weird...the lines aren't straight at all.
 The little legs on this chest of drawers were glued on crooked.  Sadie and I tried to pull them off to reglue them but they're really stuck on.  I think I may just paint this one and use it upside down in a bedroom scene, with the little legs painted to look like nail polish bottles or perfume bottles. They also sort of look like little baby bottles.
 I found these great little scrapbook paper books.  I've seen these at Michaels for a lot more than $1.25. 
 This would make great wallpaper for a focal point wall.  There are 6 sheets in each design.
 Here are the shears, scissors, and a hacksaw.  They're the reason I went to the dollar store. 
 I bought one of these little storage containers above to store my minis and it's already full so I bought two more. 
 I found a lightweight level for use with my Laurel kit, some glue, more little storage containers, and some candles just because I want the tin around them, lol.
 I bought these stencils hoping they'd be useful for polymer clay.

 And these dough cutters.

 Sadie likes the butterfly and thinks it would make a nice summertime cake.
 I grabbed a bunch of these baby toys in hopes that they could be used as clay cutters.  I had to buy all three because I wanted the circle from one, the square from another, and the oval from the third., lol.
 I am going to try using the square cutter to make brownies.
I also bought some tissue paper with tiny patterns on it, to use as cupcake wrappers, some glass things that look like cabachons but are not (I can't believe they were at the dollar tree when I paid full price for them at Michaels the other day).  I also picked up some baby rattle notions and a little flashlight.  I am going to try to hang the flashlight so the light shows but the flashlight does not, lol. 
Mini bowls
I saw a youtube video showing how to turn these little rattles into bowls.  You can view it here.
I used the new shears to cut them apart and ended up with these two cute bowls, which need to be sanded.
Sadie is thrilled with them!  I like them too!